User Interface
The User Interface is the facade of your Element. It’s the controls that your users interact with, which in turn call your API Methods.
User Interface constructor has a very intuitive flow, and usually it takes about 30 minutes to understand it an construct an Element UI. The best way to learn about it is to create an example based on an existing API.
Constructor
Assuming that we have created the Countries List method and Country object, let’s create a simple User Interface that will have a button and a grid, and when clicking on the button, the system will call a method to fetch all the countries and display the results. Also when clicking on a country row in the grid we will output the selected country object in the console.
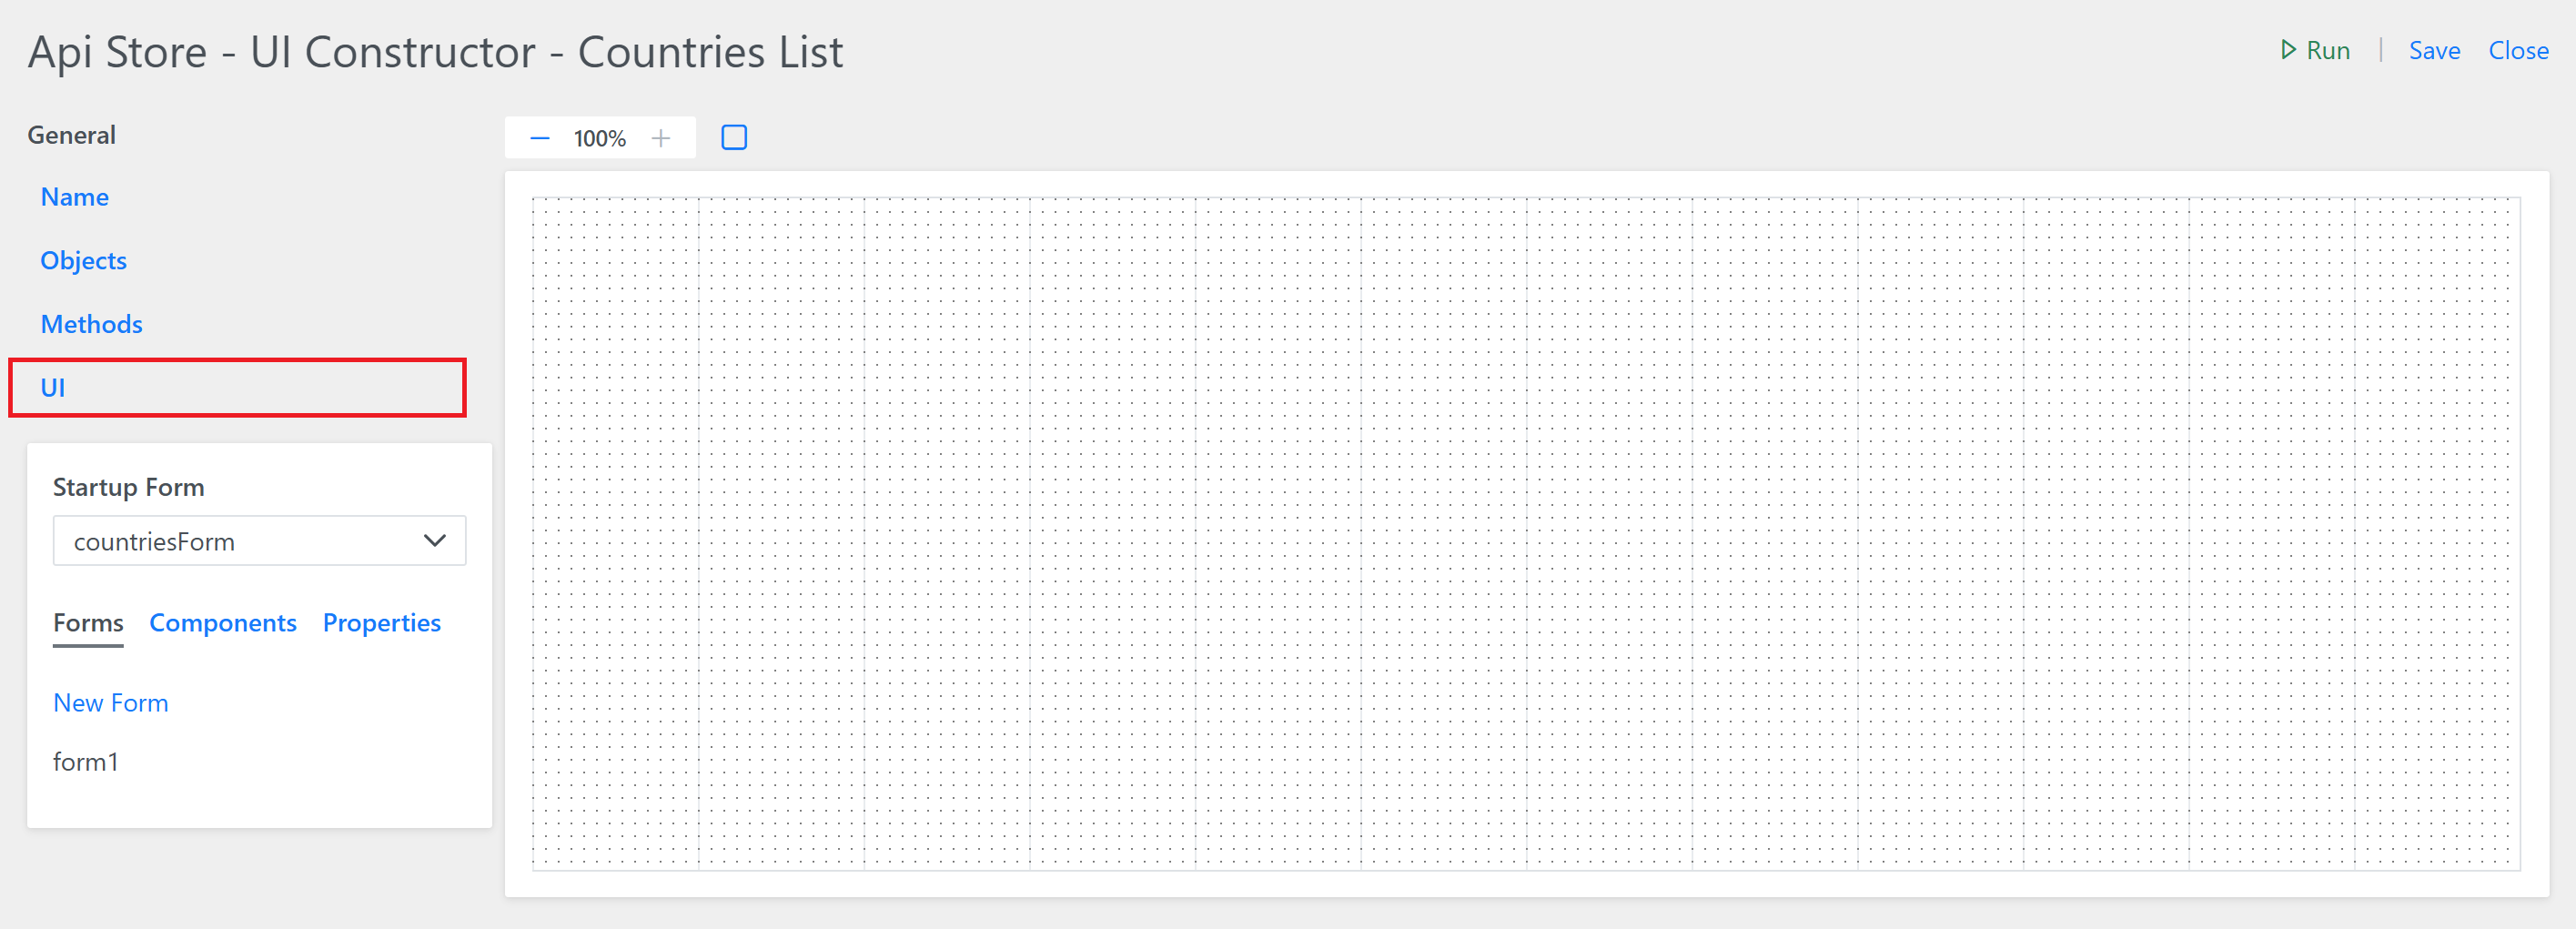
To create a Element User Interface, click on UI in the left menu. You will see the UI Contructor:
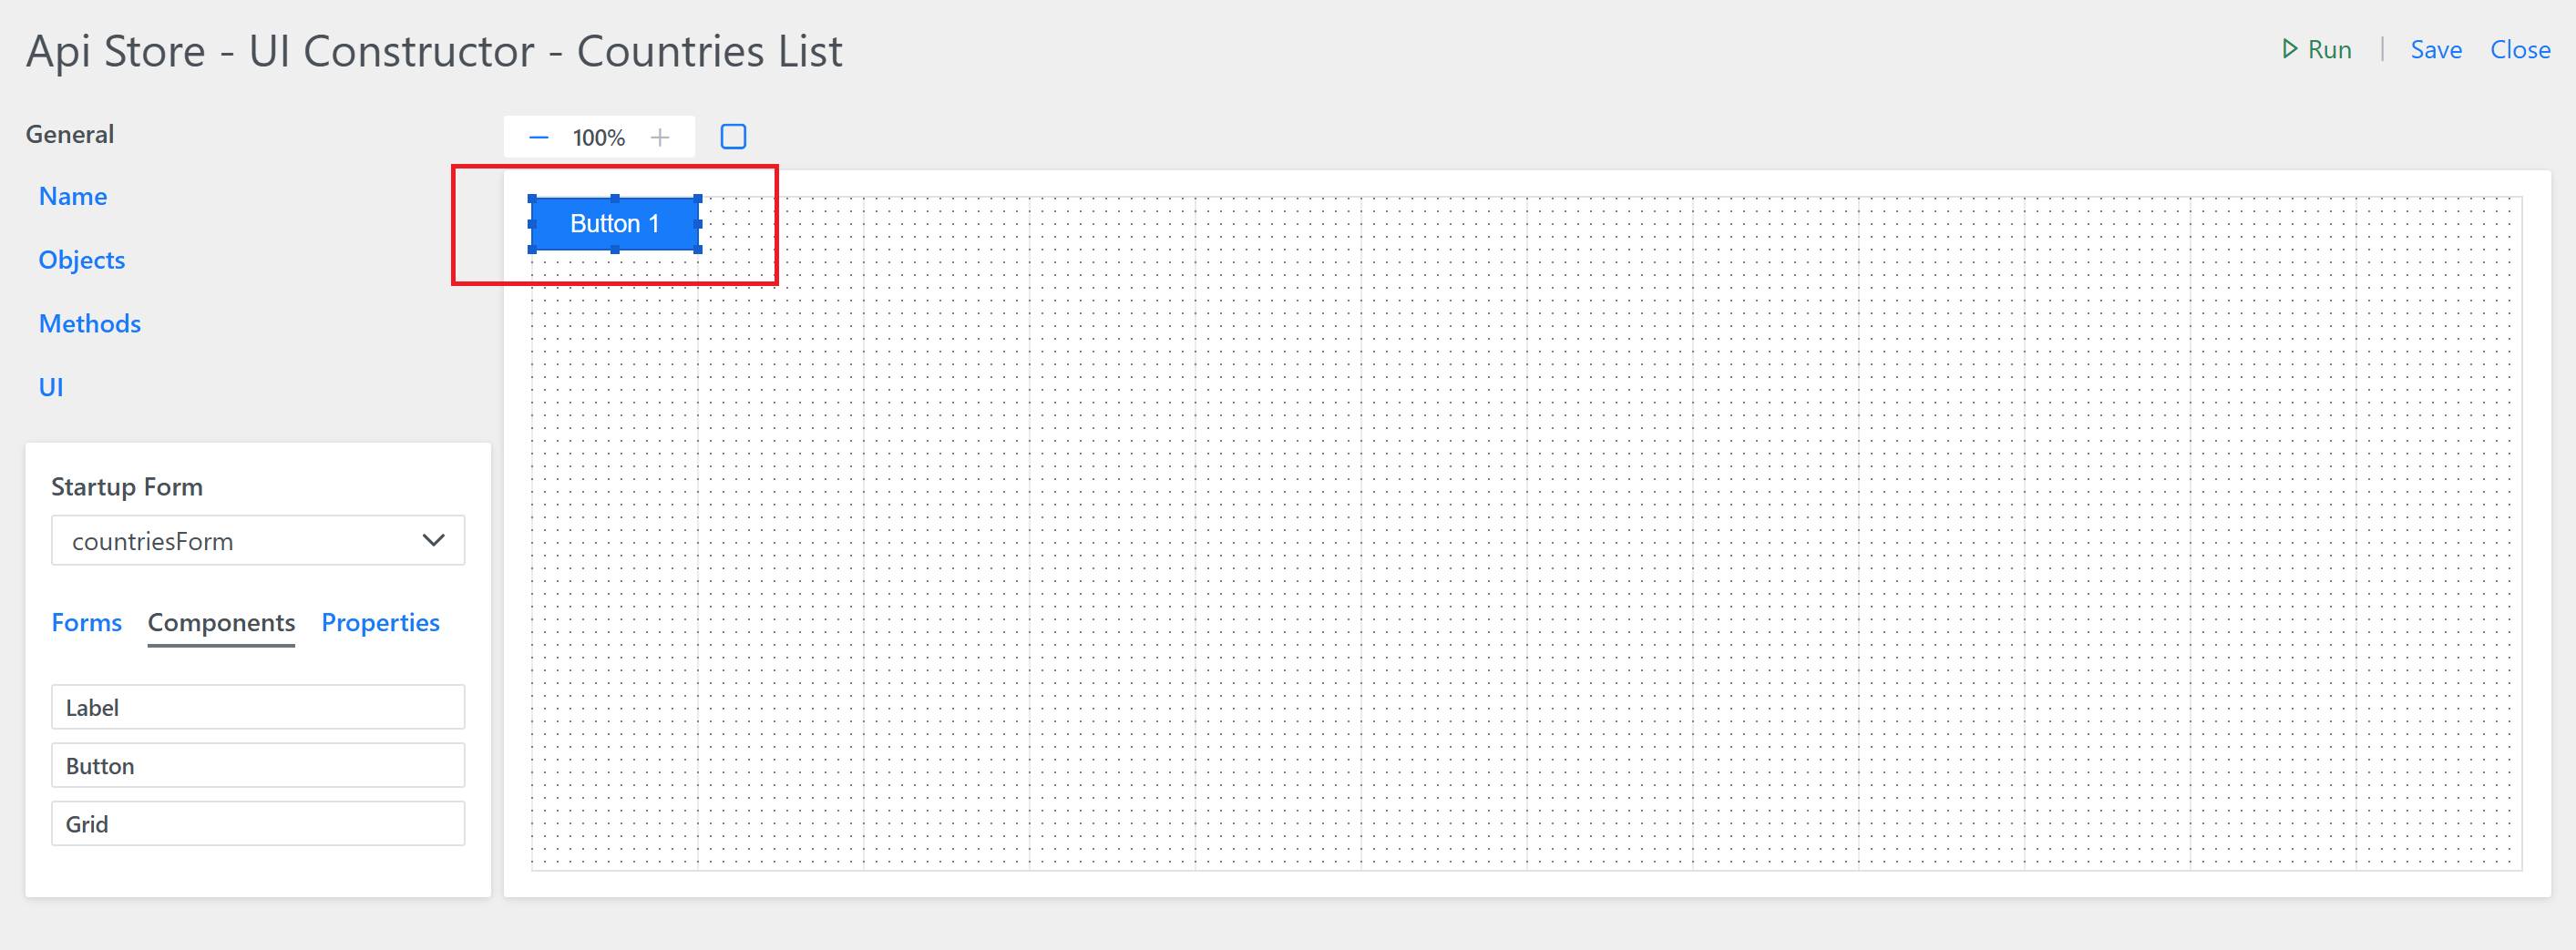
Click on Components tab in the left menu and drag and drop a button onto the form to the right:
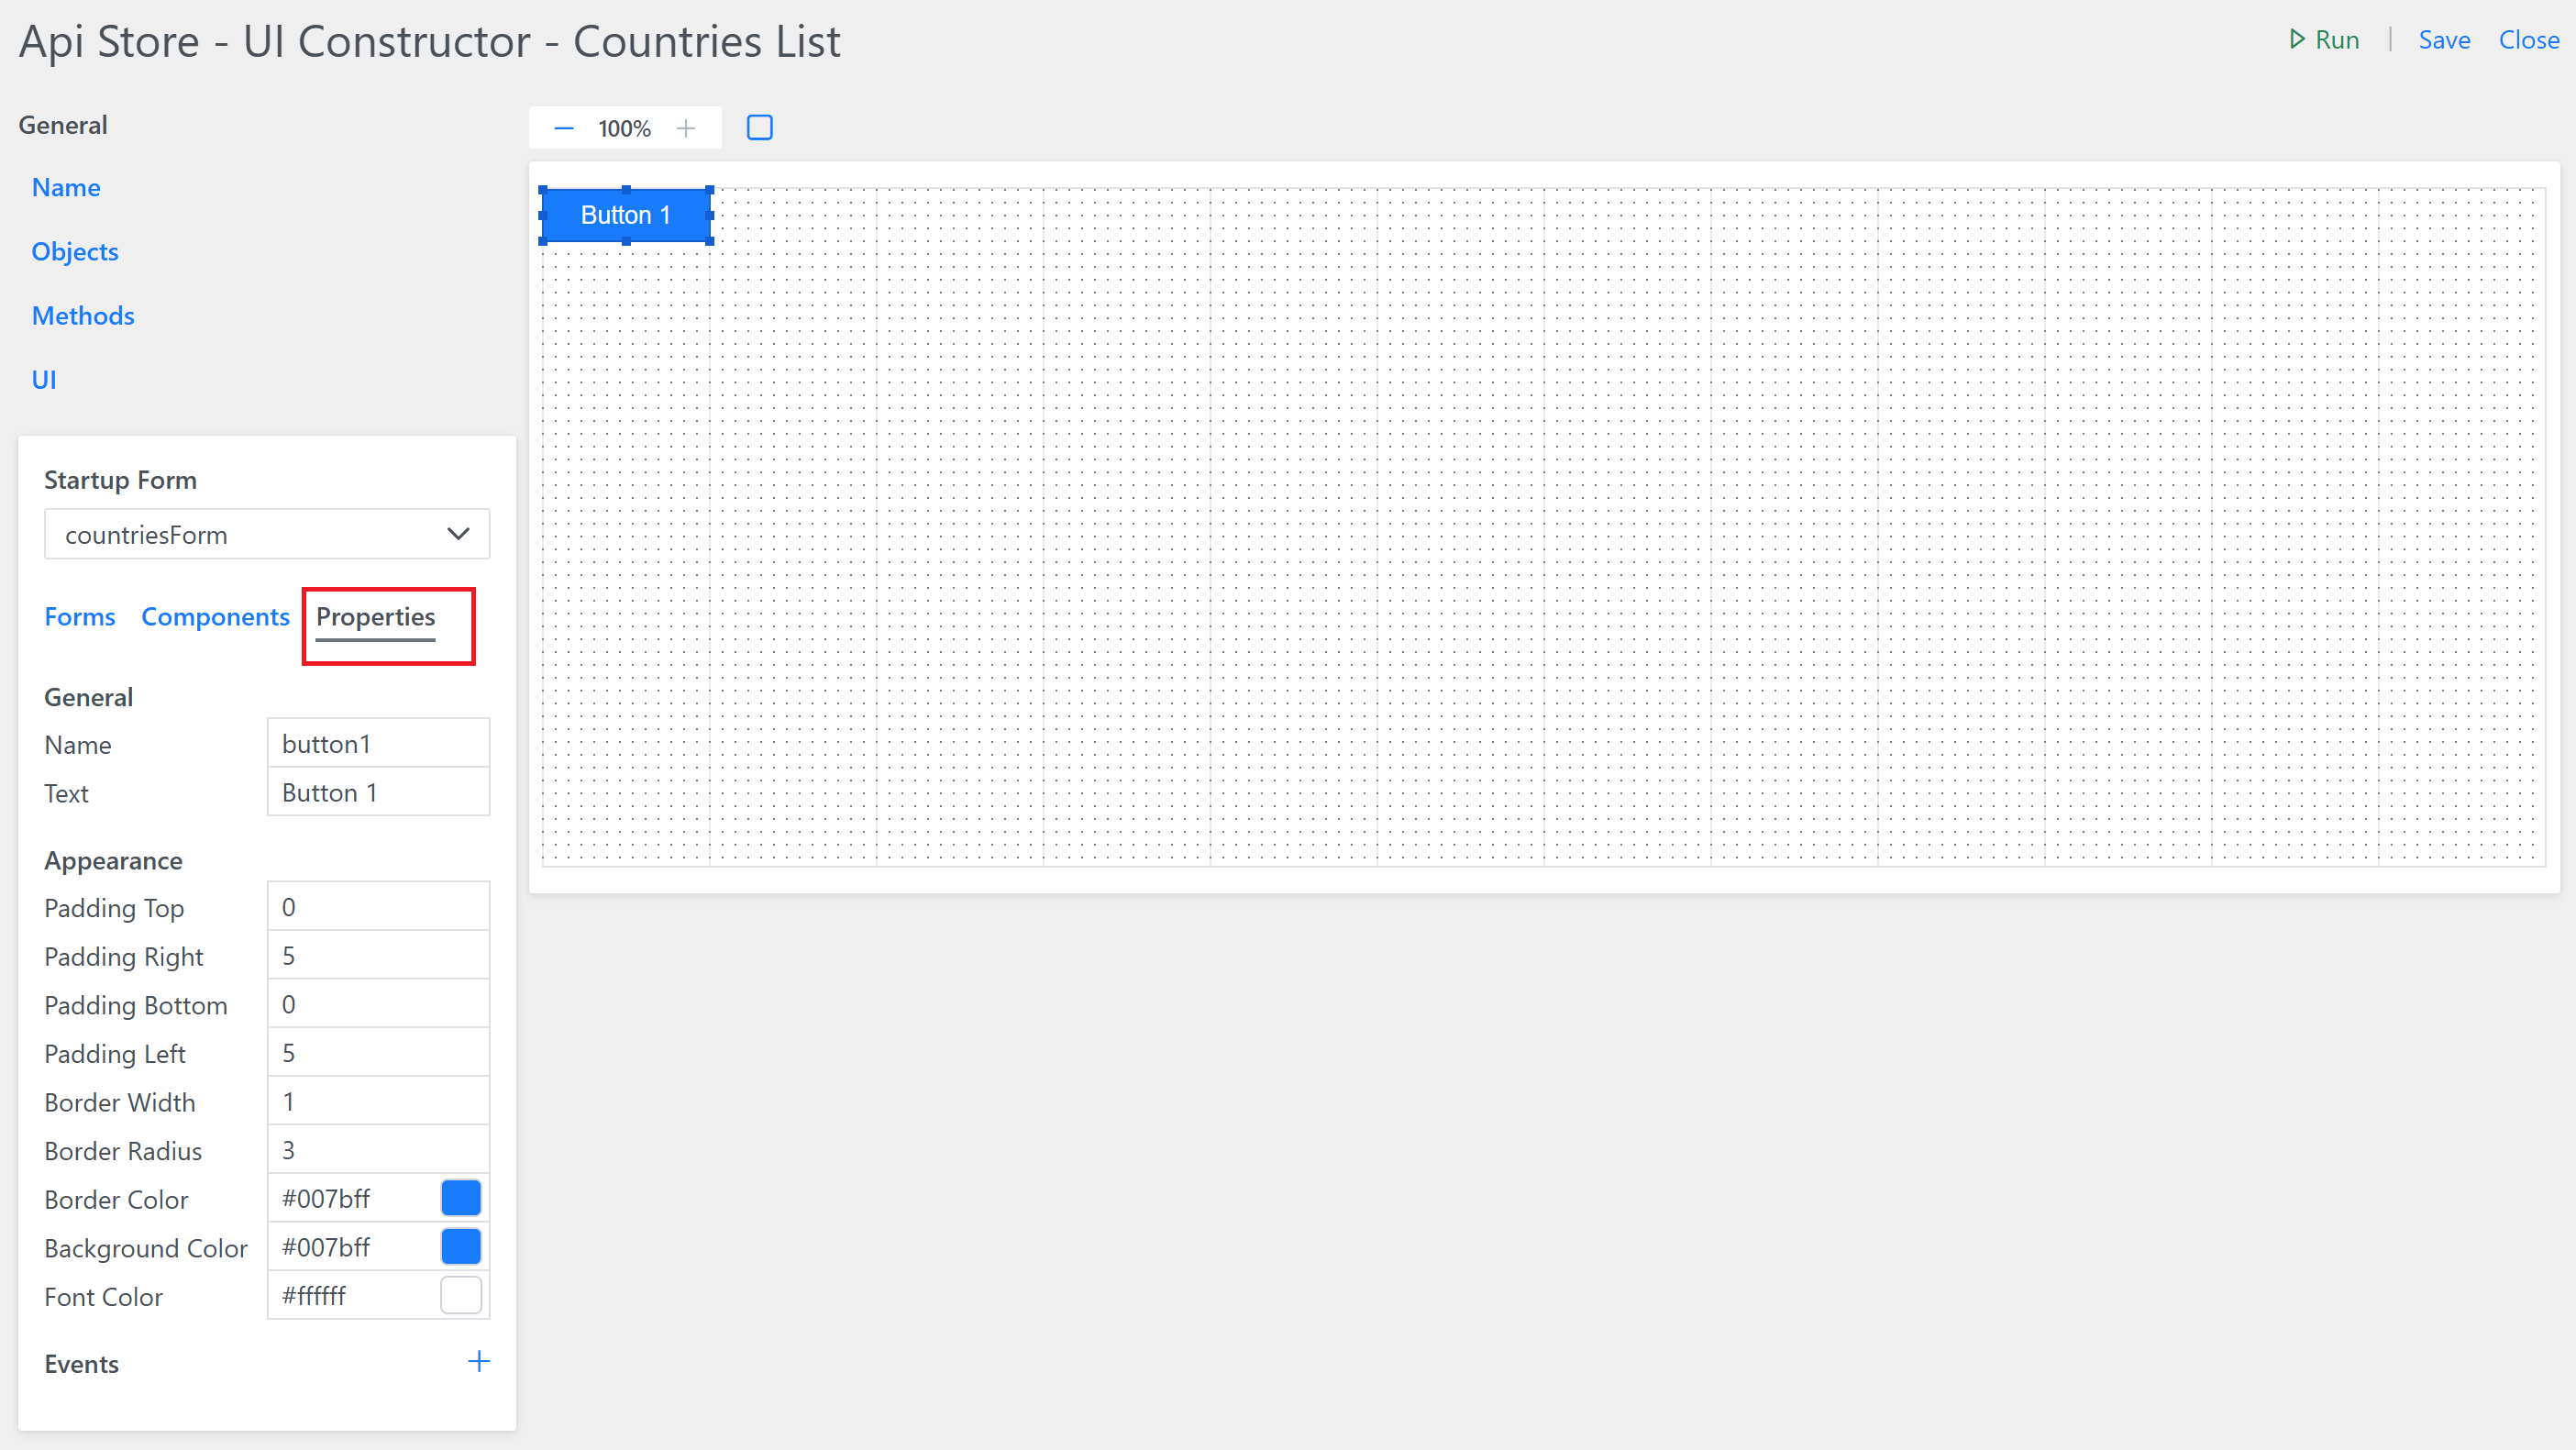
If you select Properties tab, you will see a list of customizable properties for selected button. Adjust some if needed:
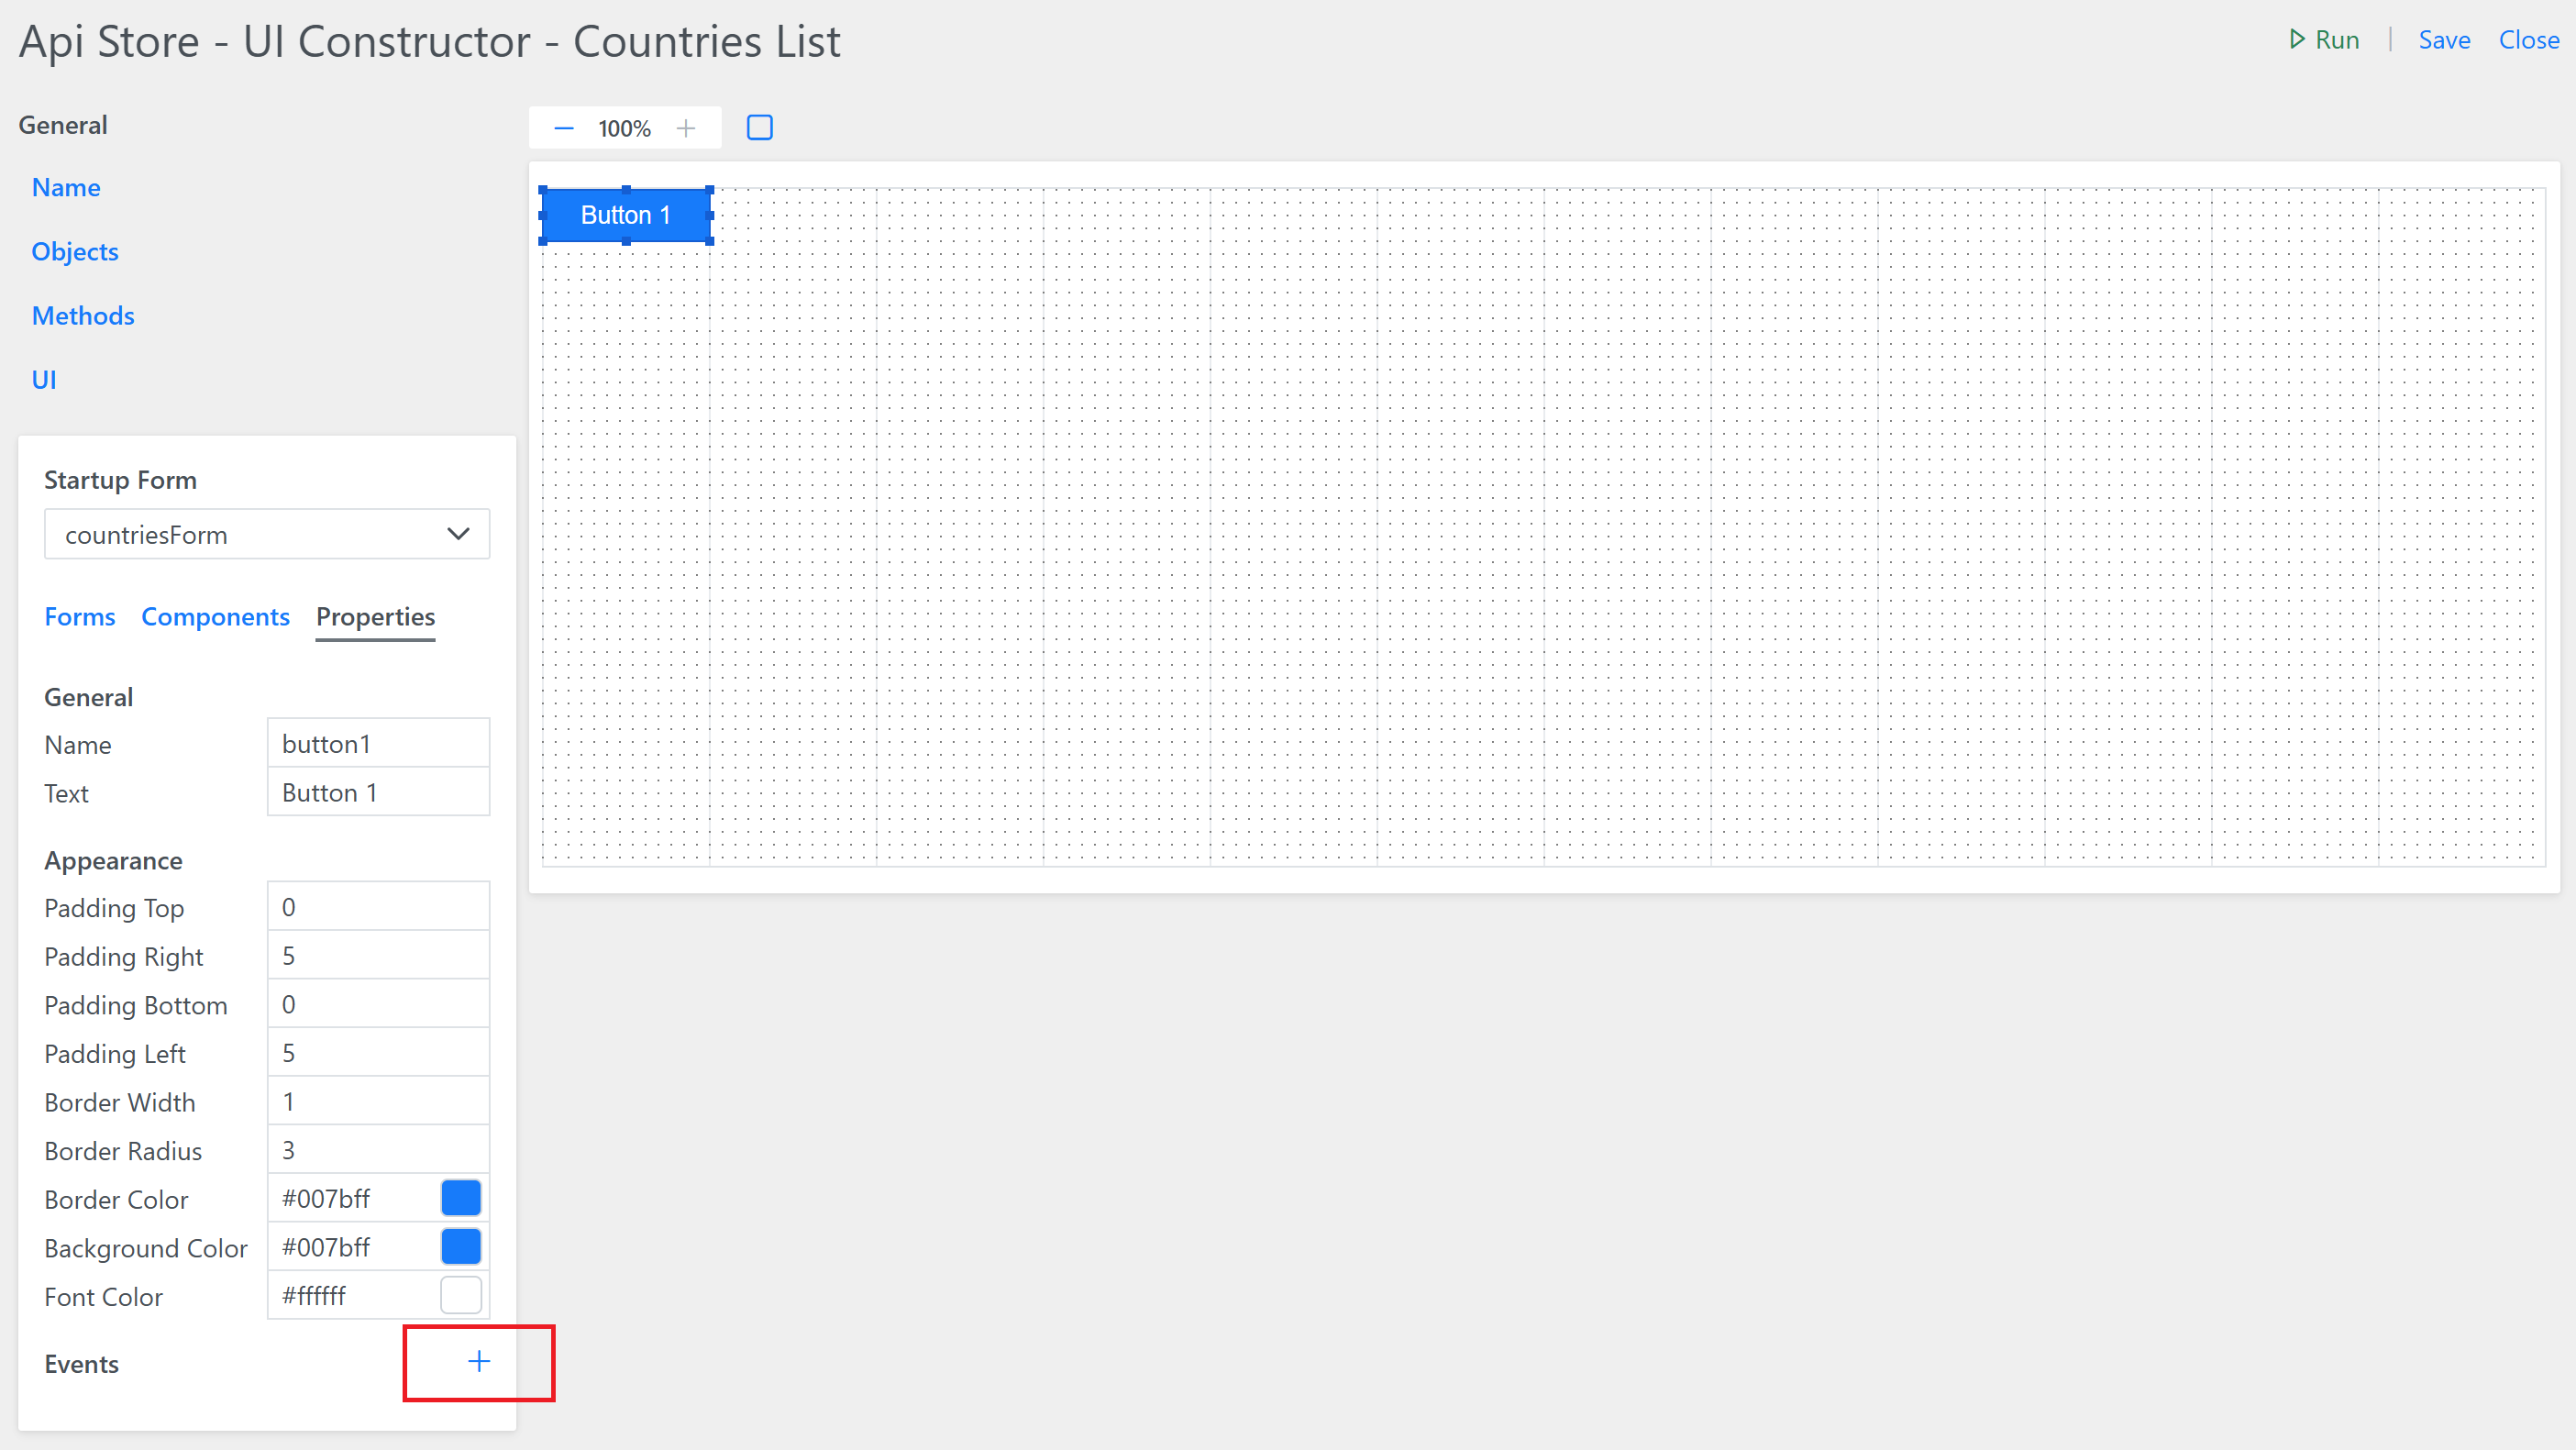
In the Properties tab, click on the click on the ’+’ button:
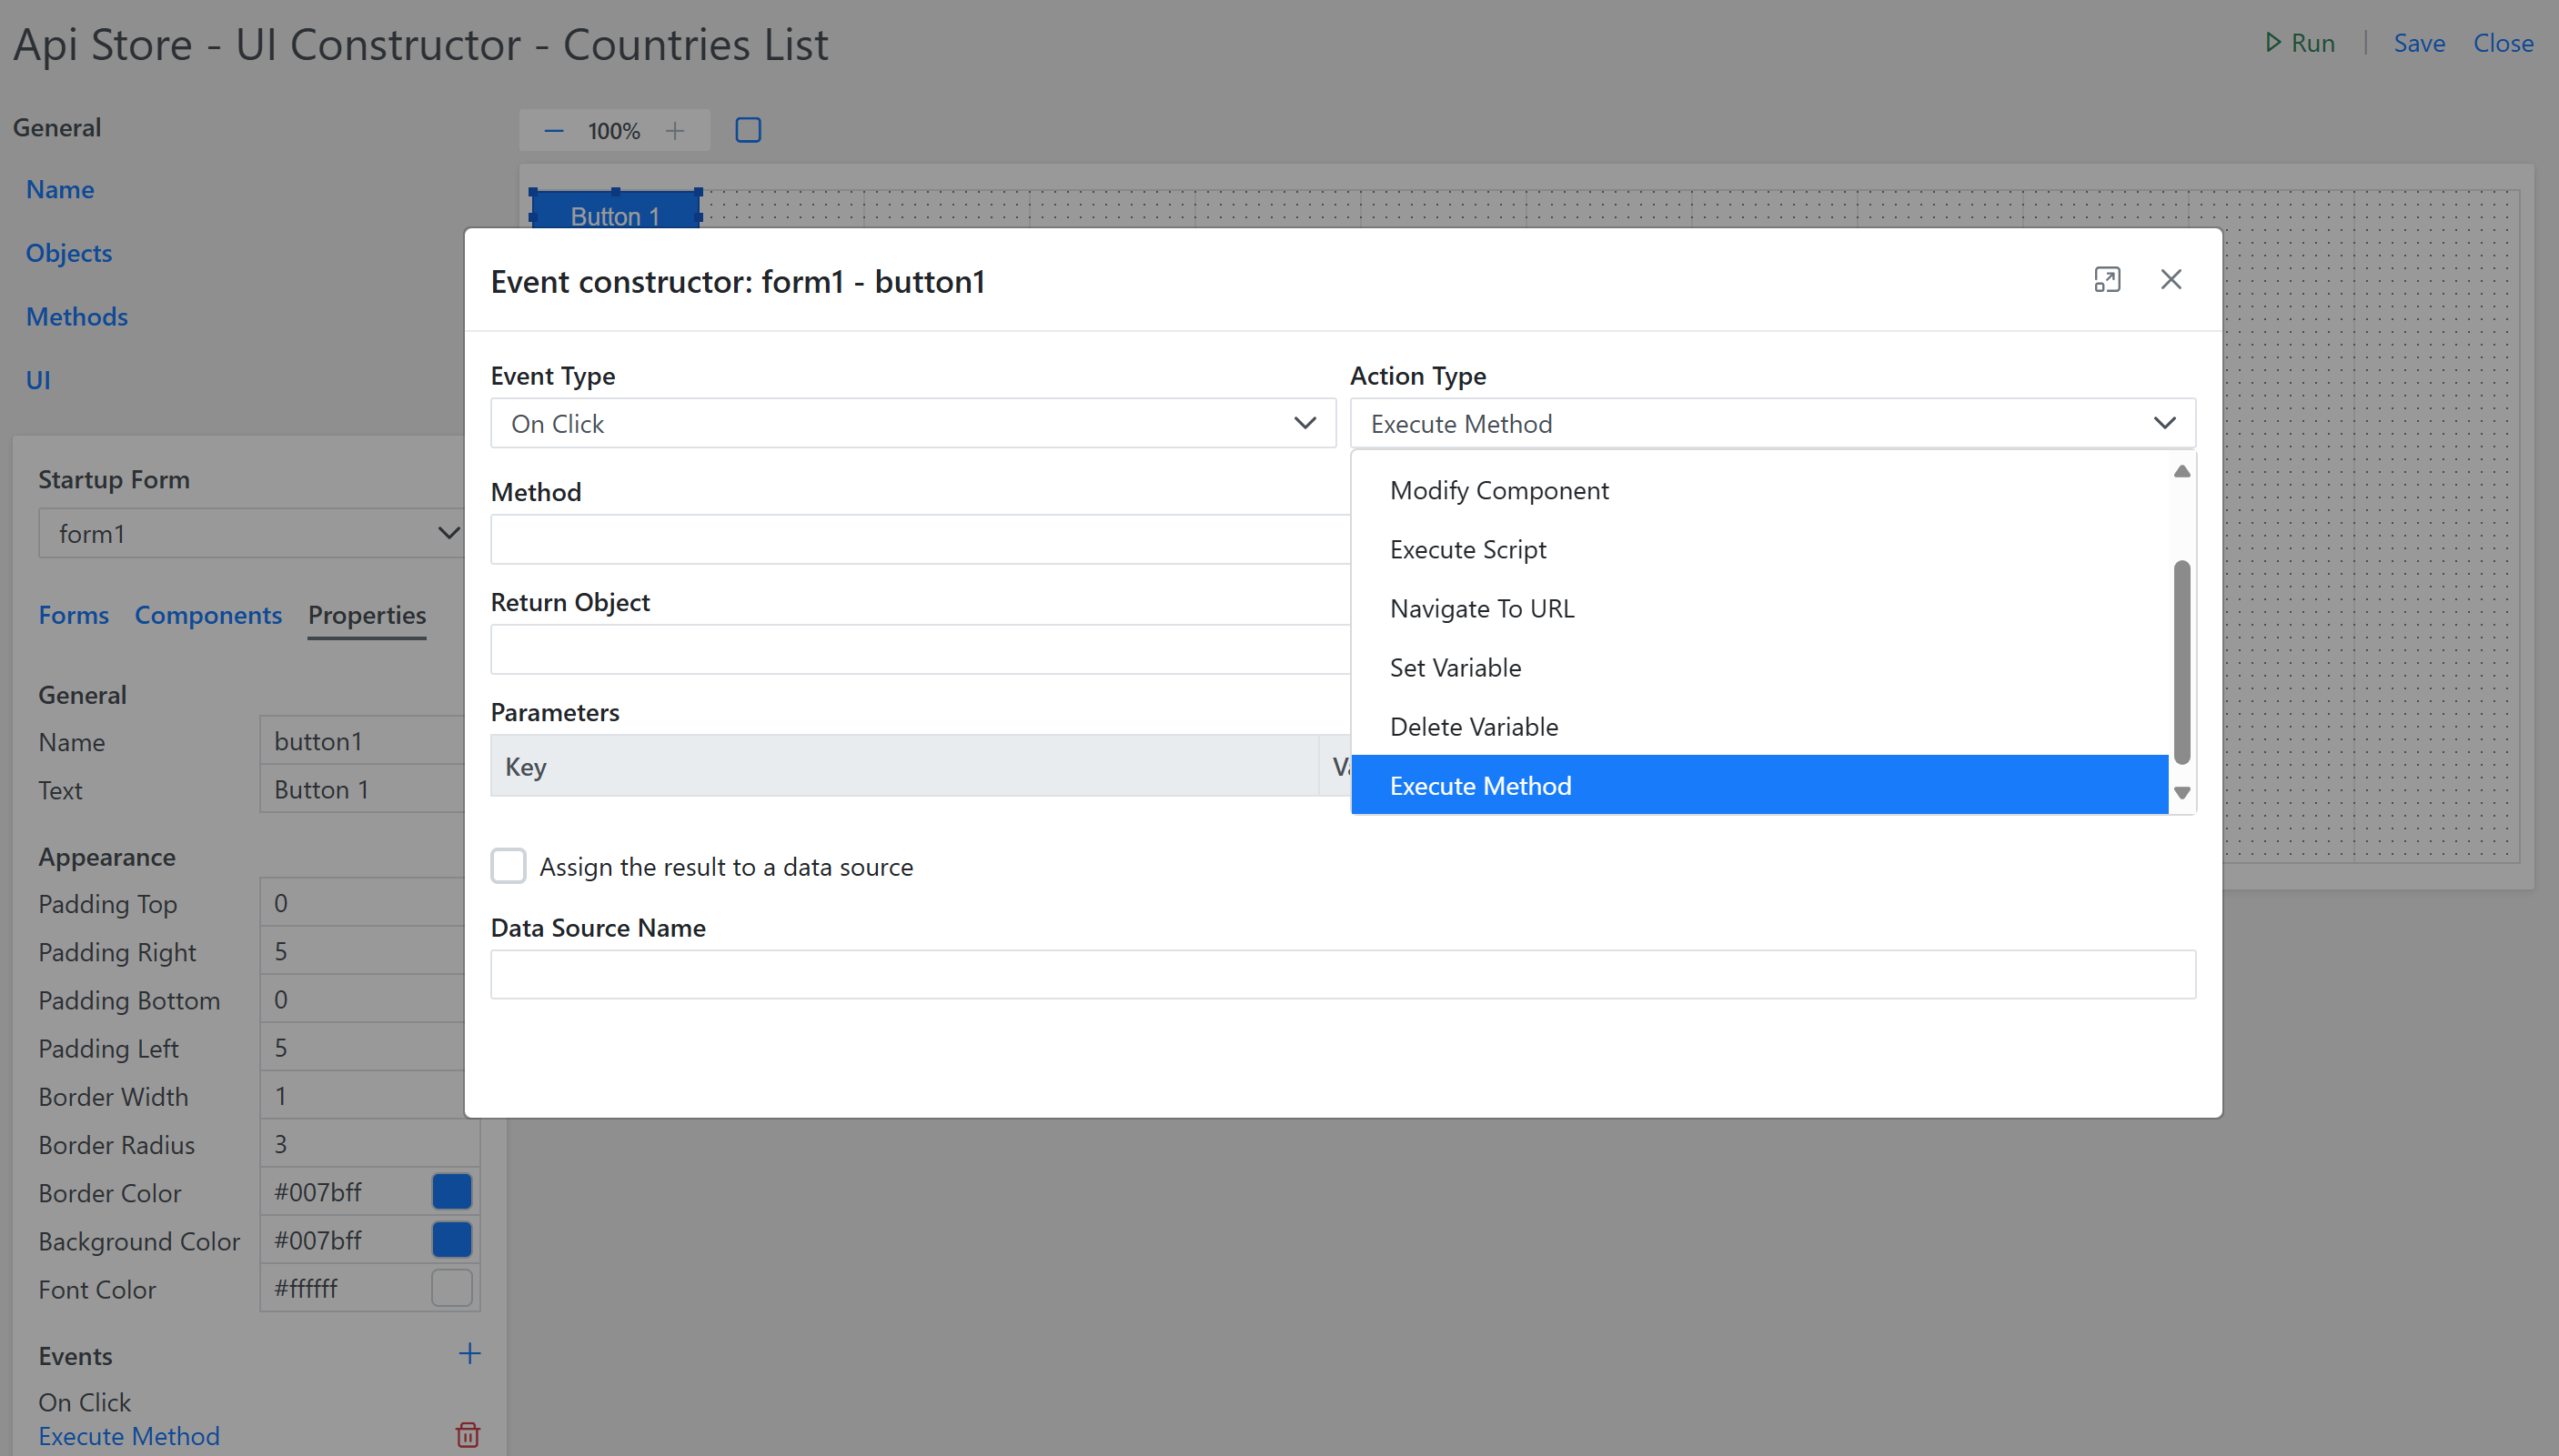
In the Event Contructor dialog, select On Click as Event Type and choose Execute Method as Action Type:
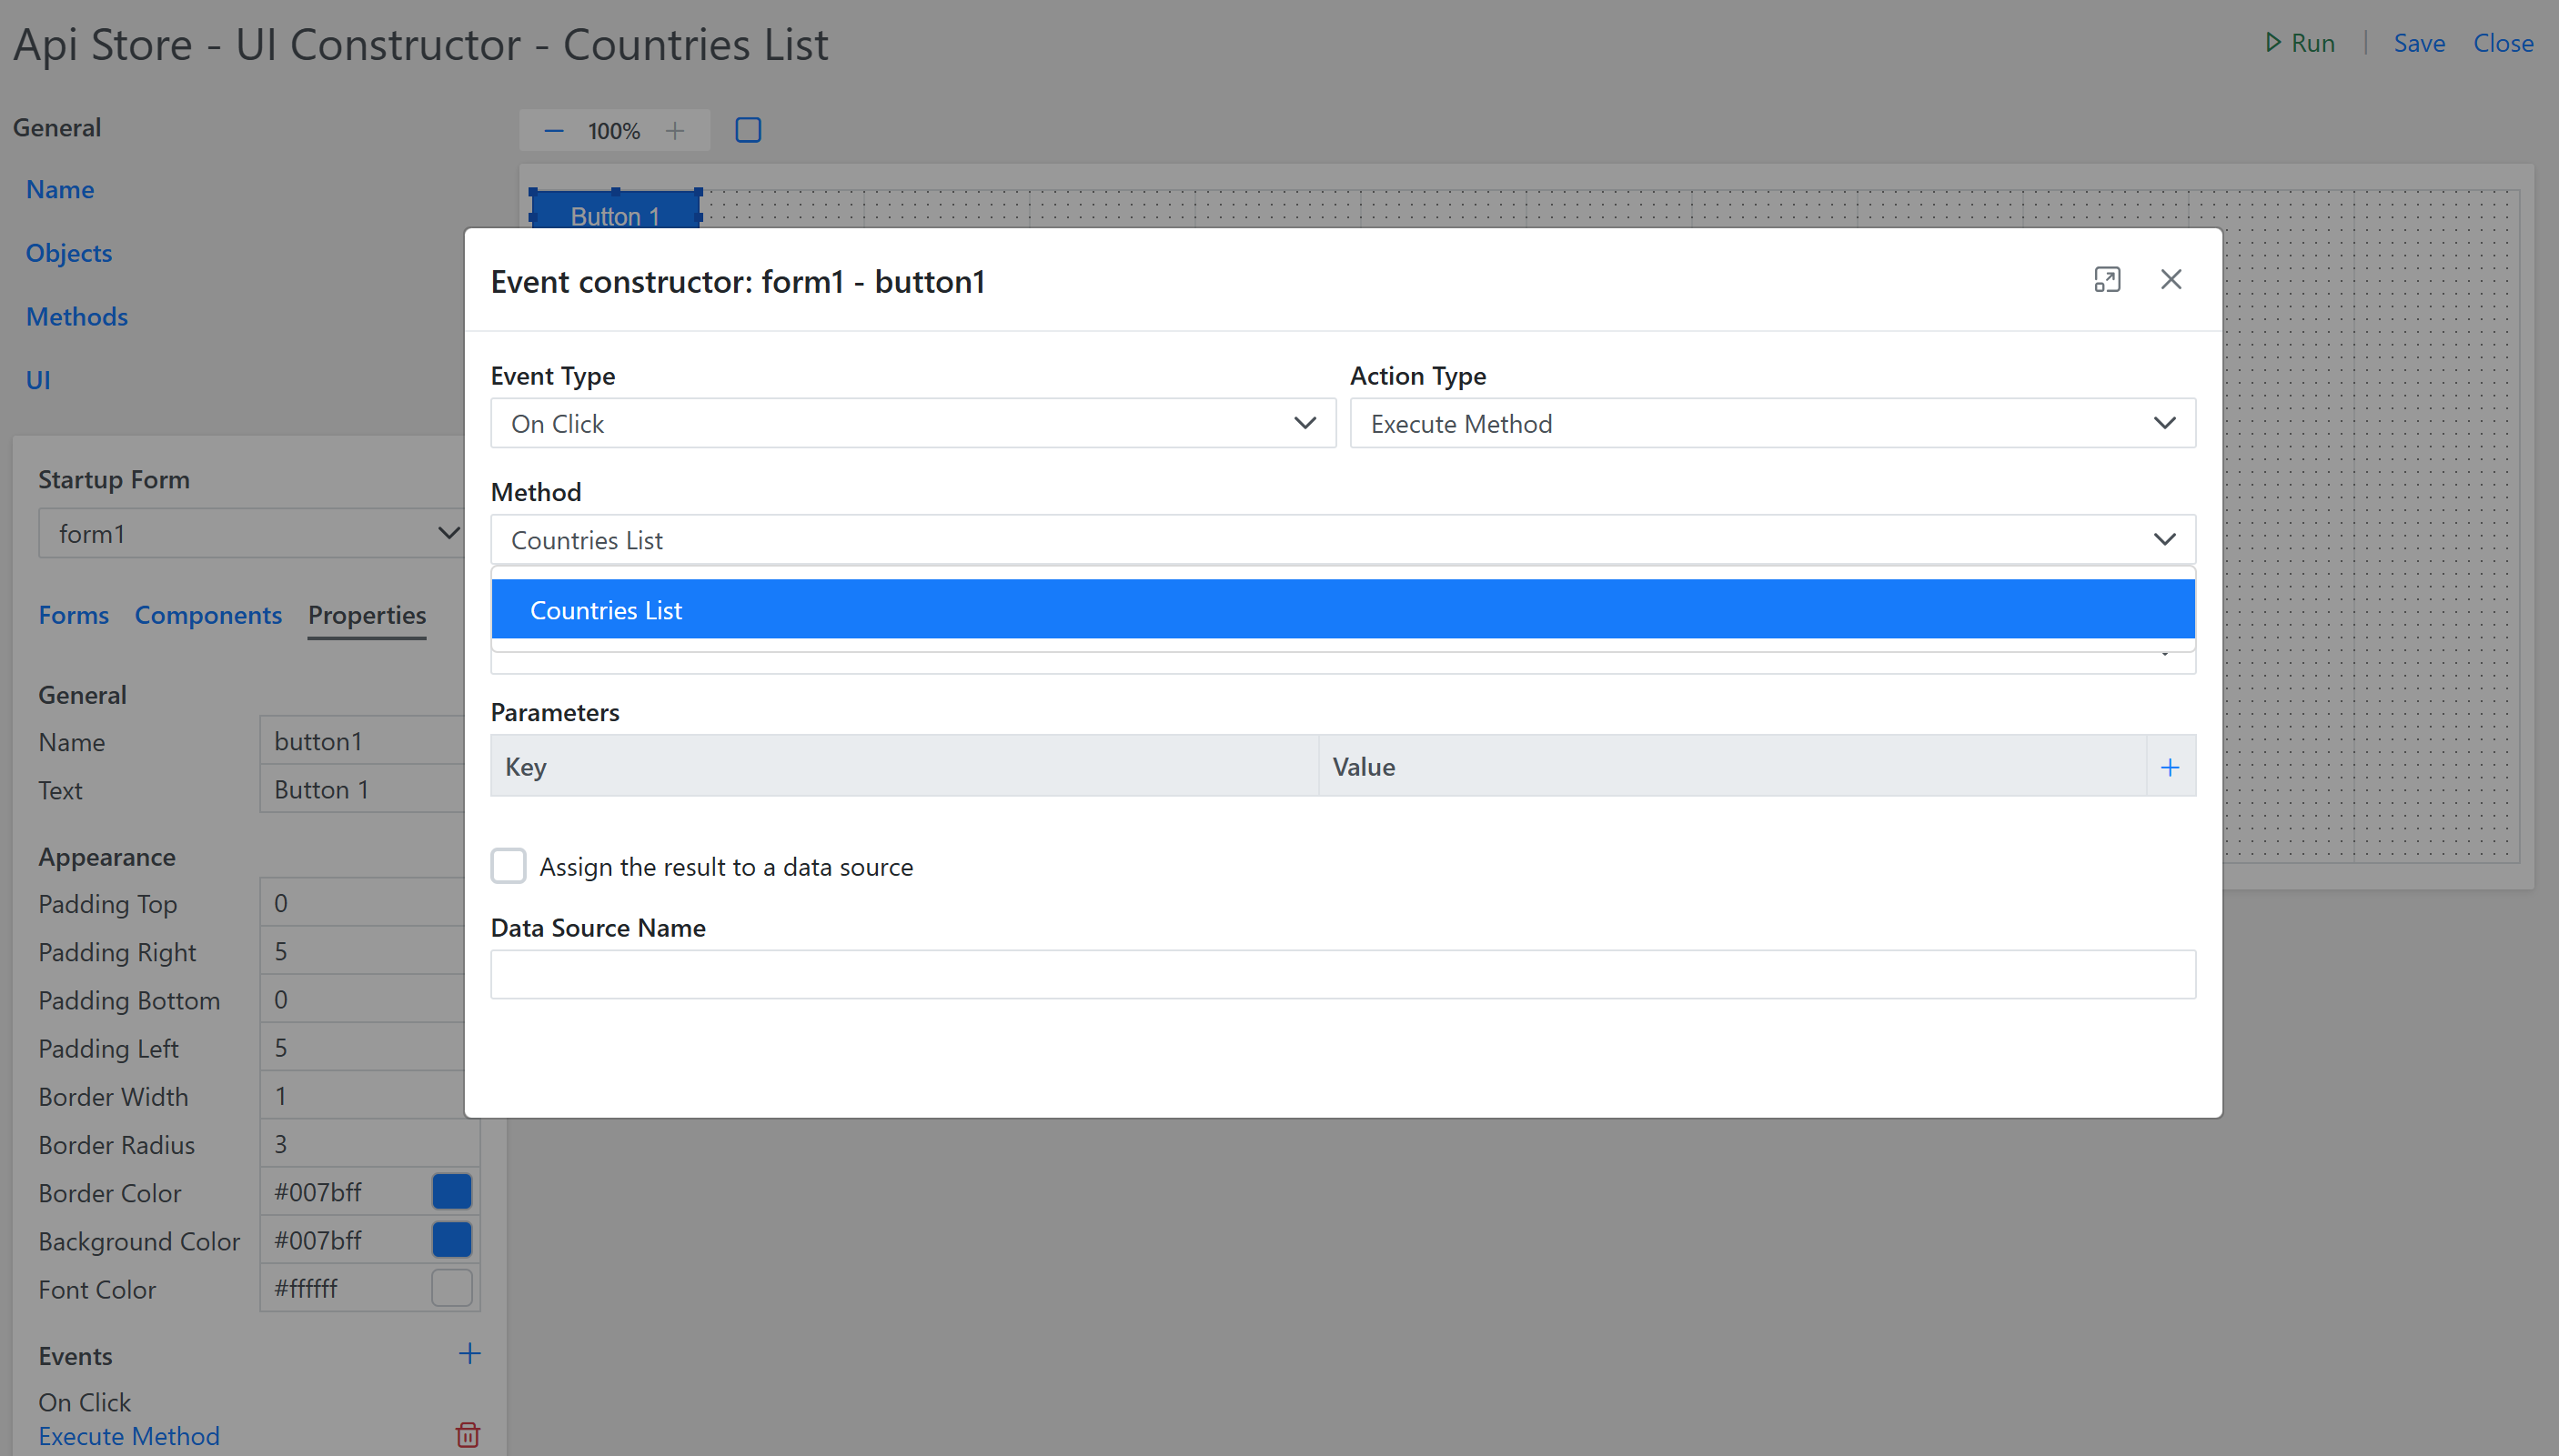
Select Countries List in the Method dropdown (see the Methods section to learn how to define a Method):
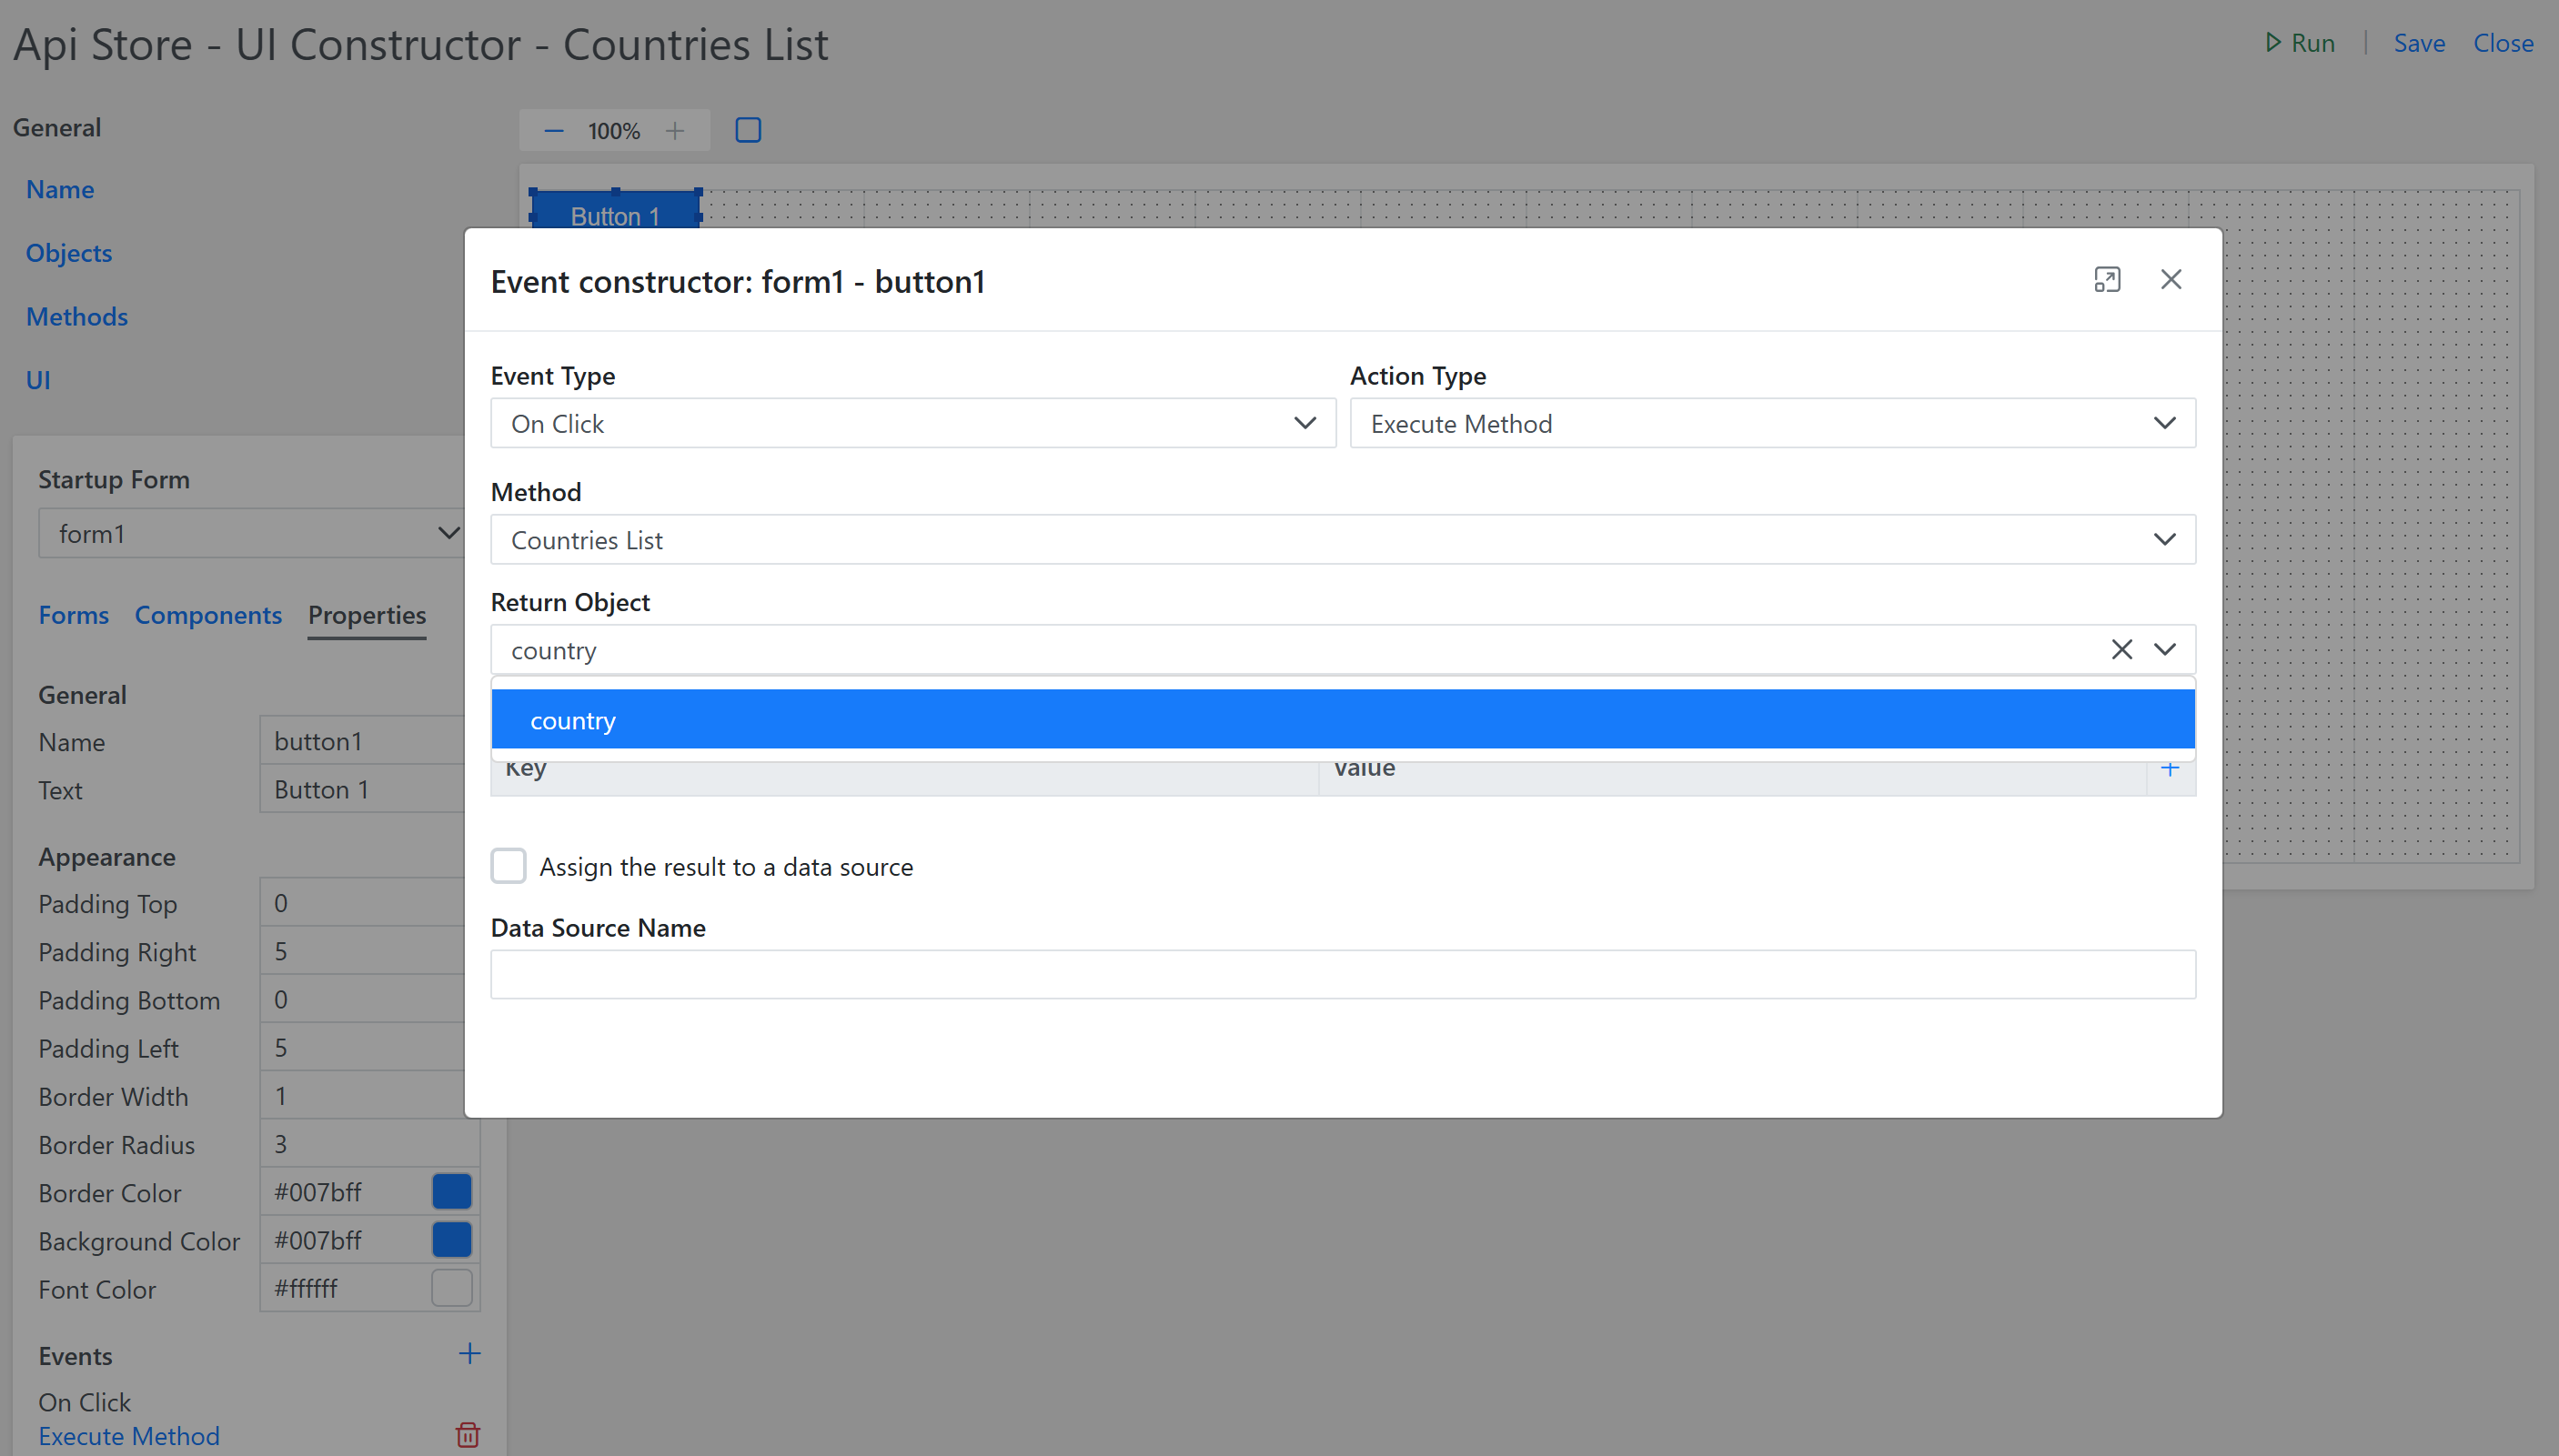
Select country in the Return Object dropdown (see the Objects section to learn how to define an Object):
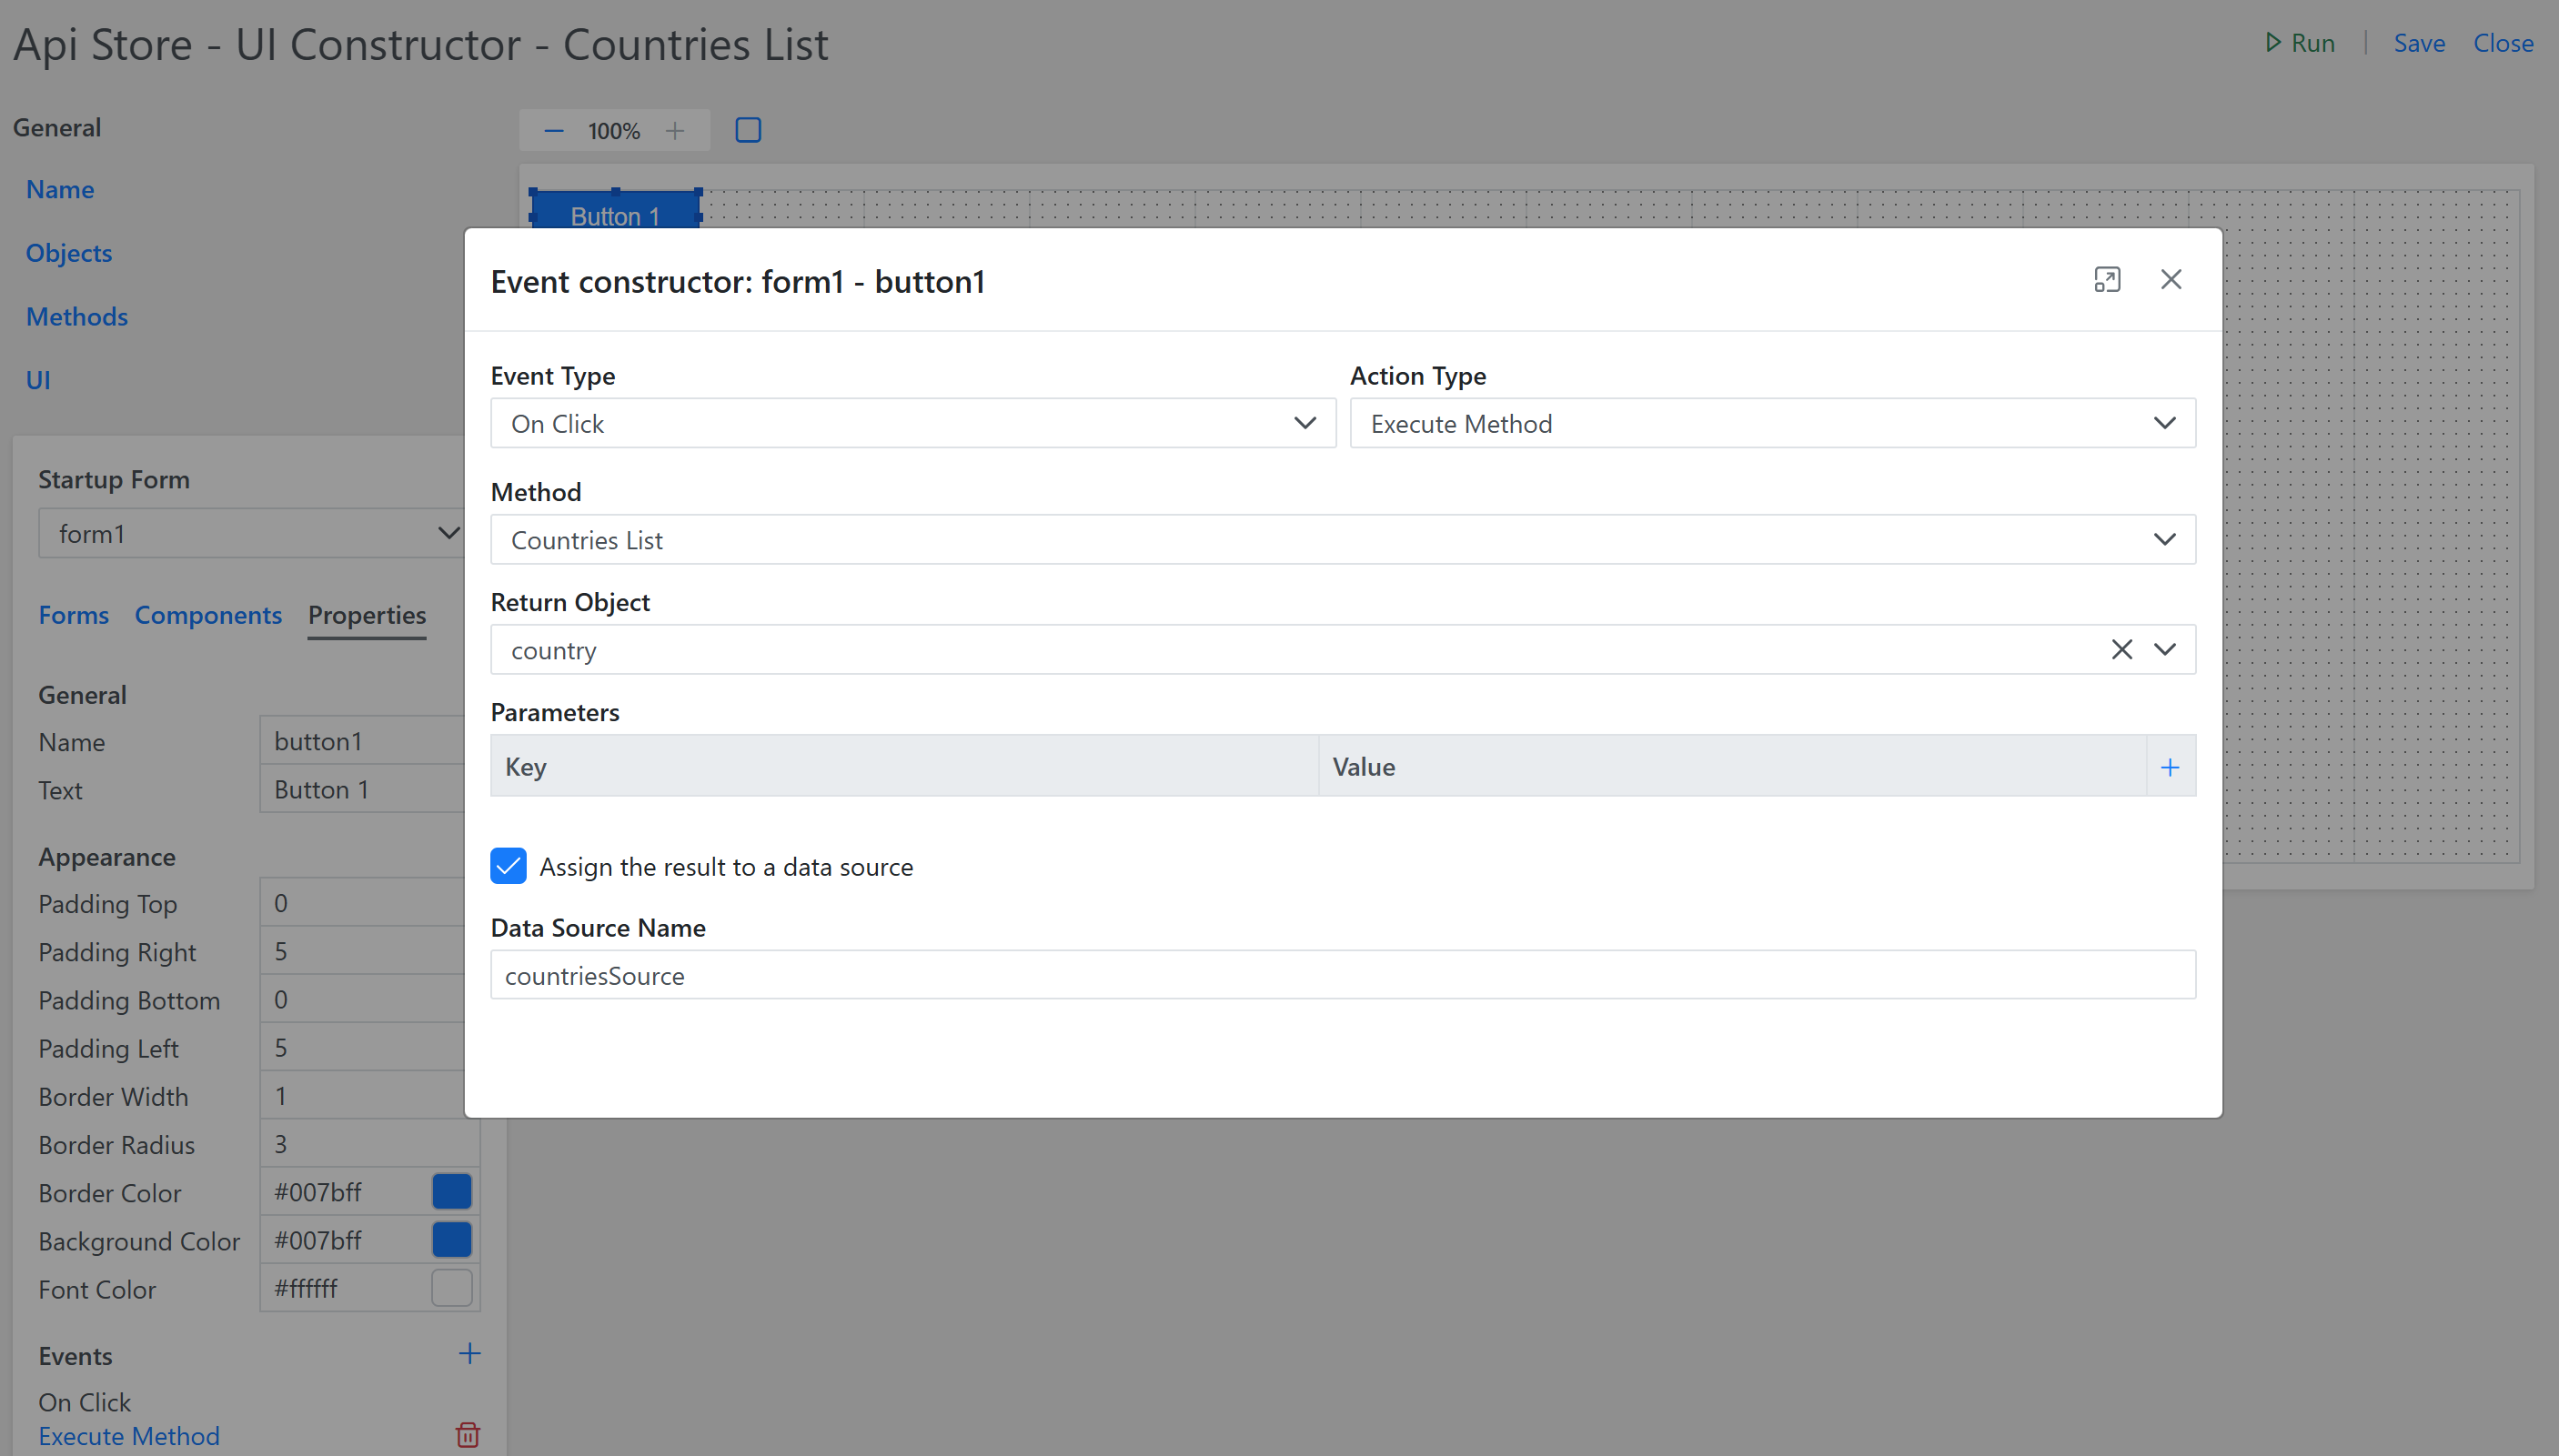
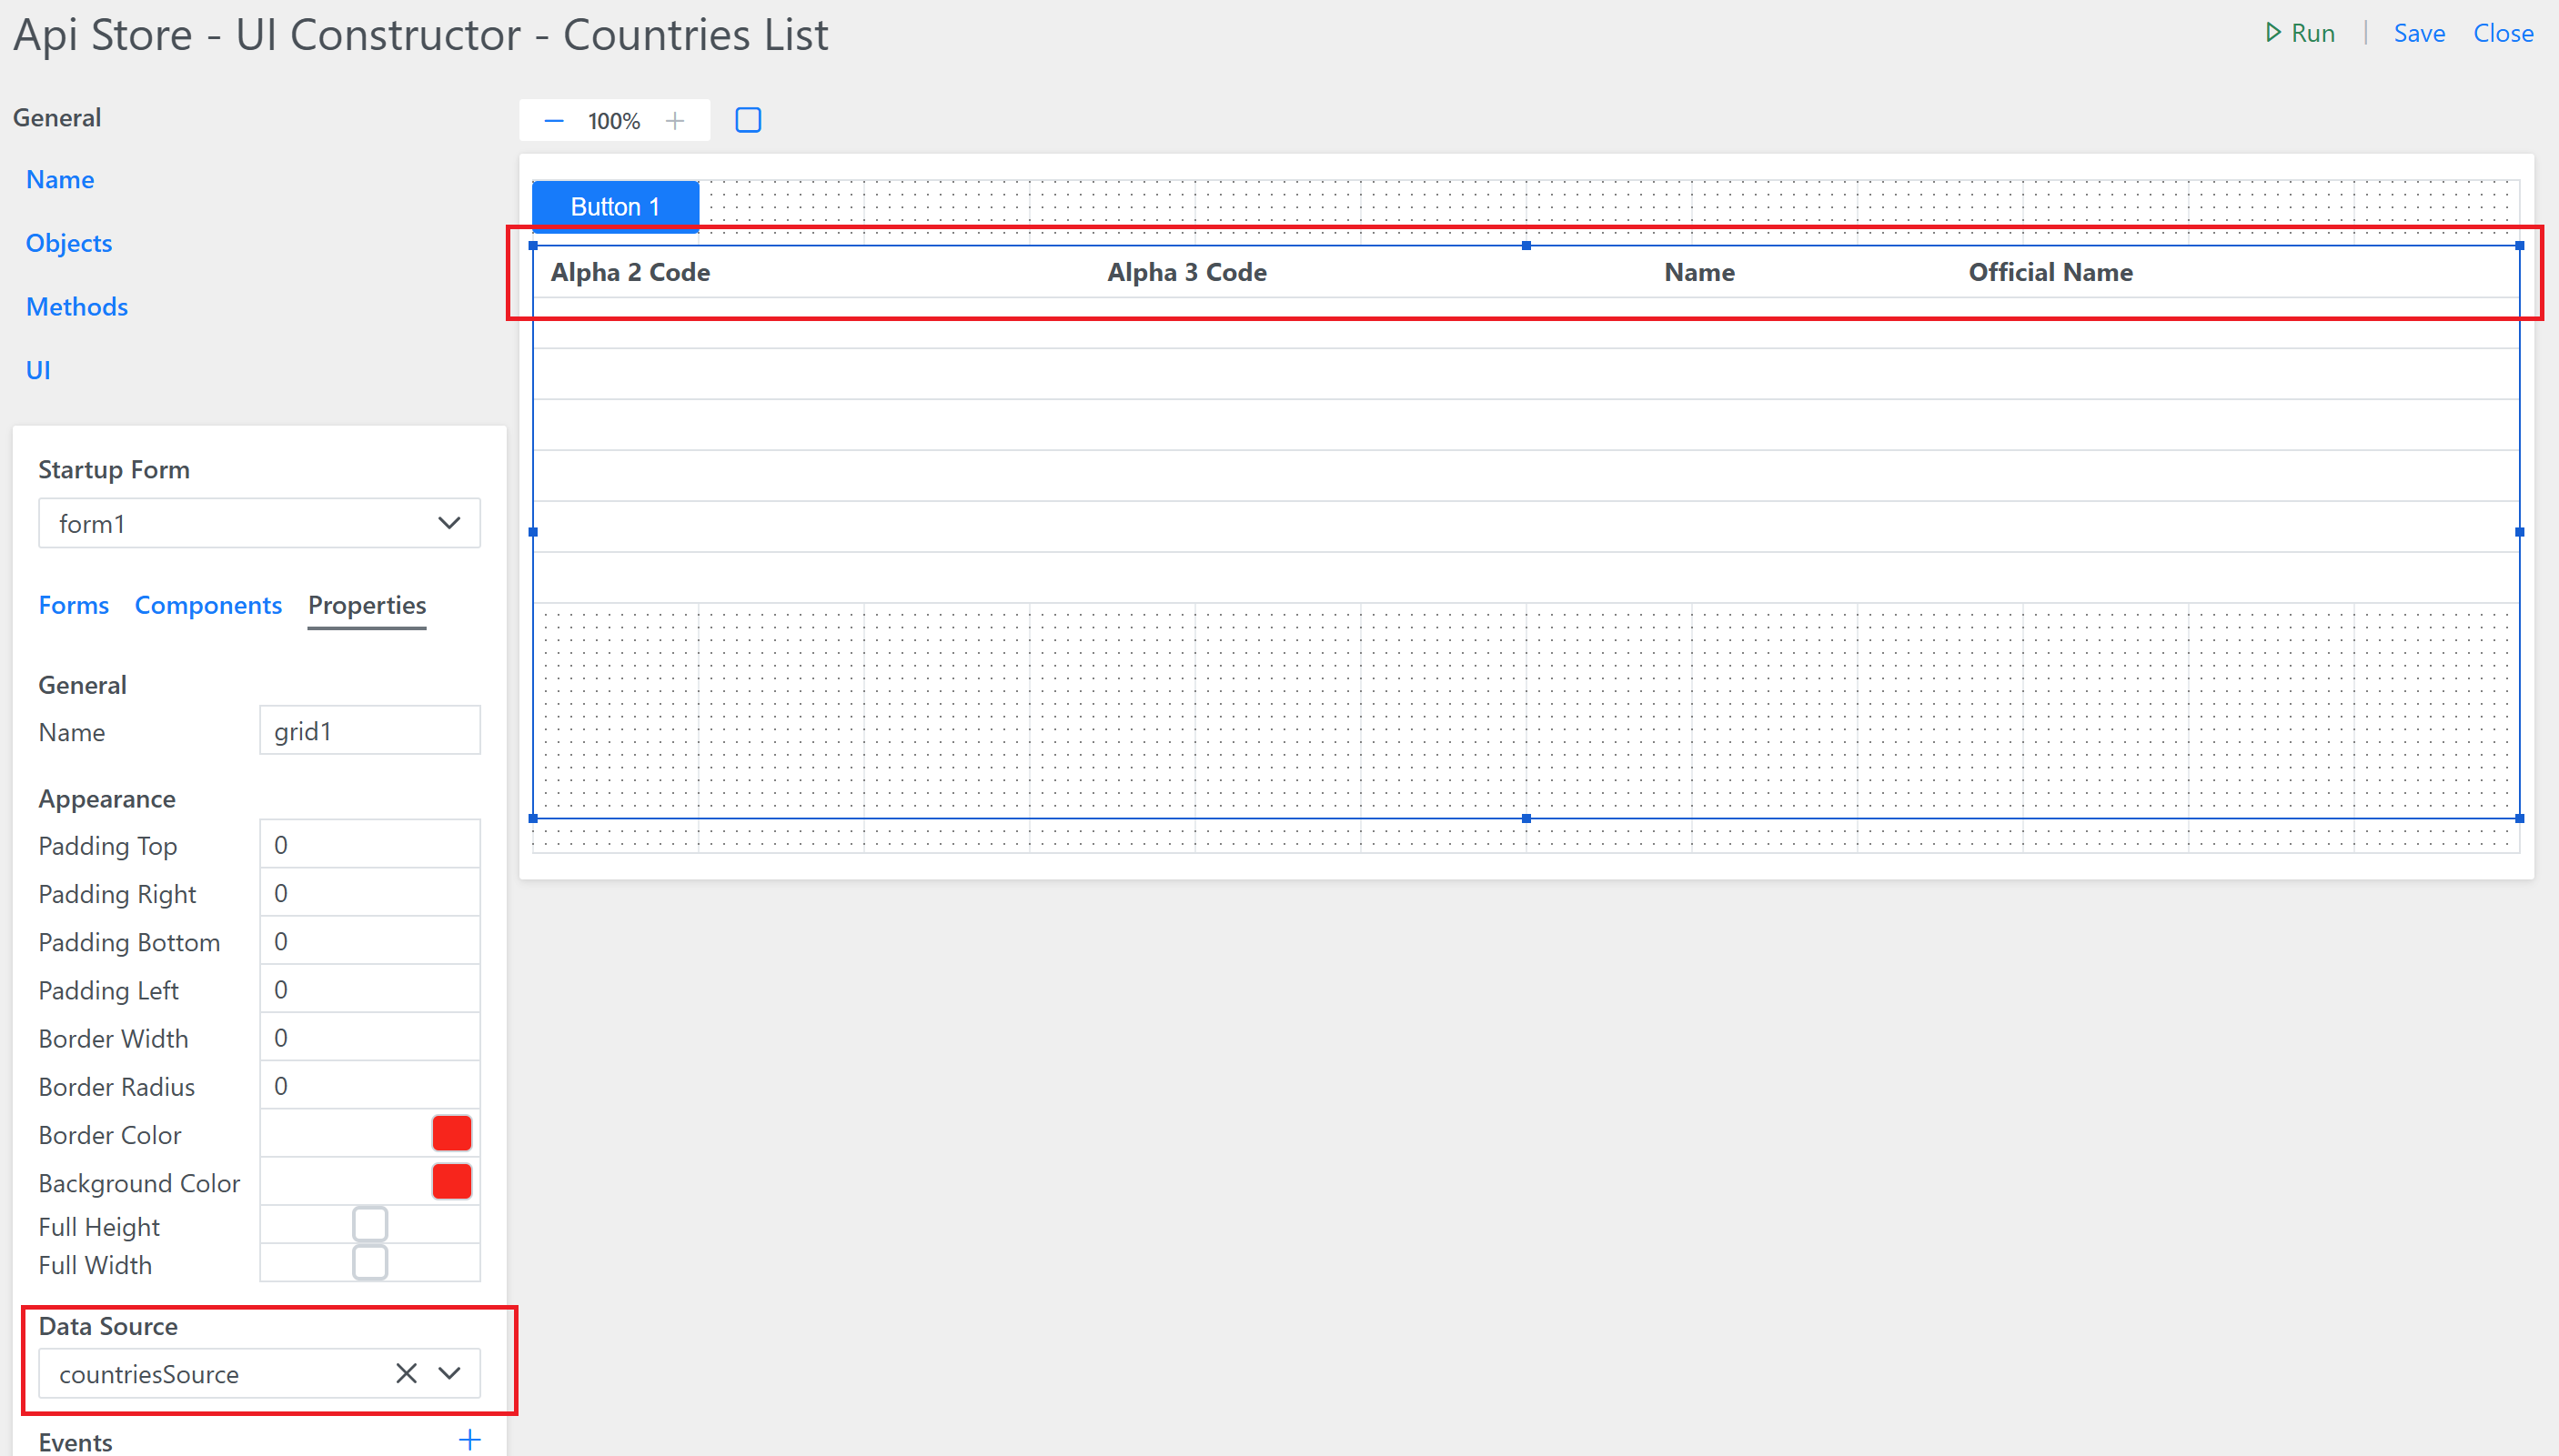
Check the Assign the result to a data source checkbox and set the countriesSource as Data Source Name:
Next, close the Event Constructor, navigate to compenents and drag and drop the Grid component on the form. Select countriesSource from the Data Source dropdown. The grid will automatically pick up the Object associated to this Data Source and constructs the columns based on defined Object Properties:
In the Button Properties Tab from the left menu click the ’+’ button to add a new Event. Select Execute Script in the Action Type dropdown and enter the following code:
form1.grid1.render();
Close the Event Constructor, click on Save if needed, and click on Run, the click on Button1:

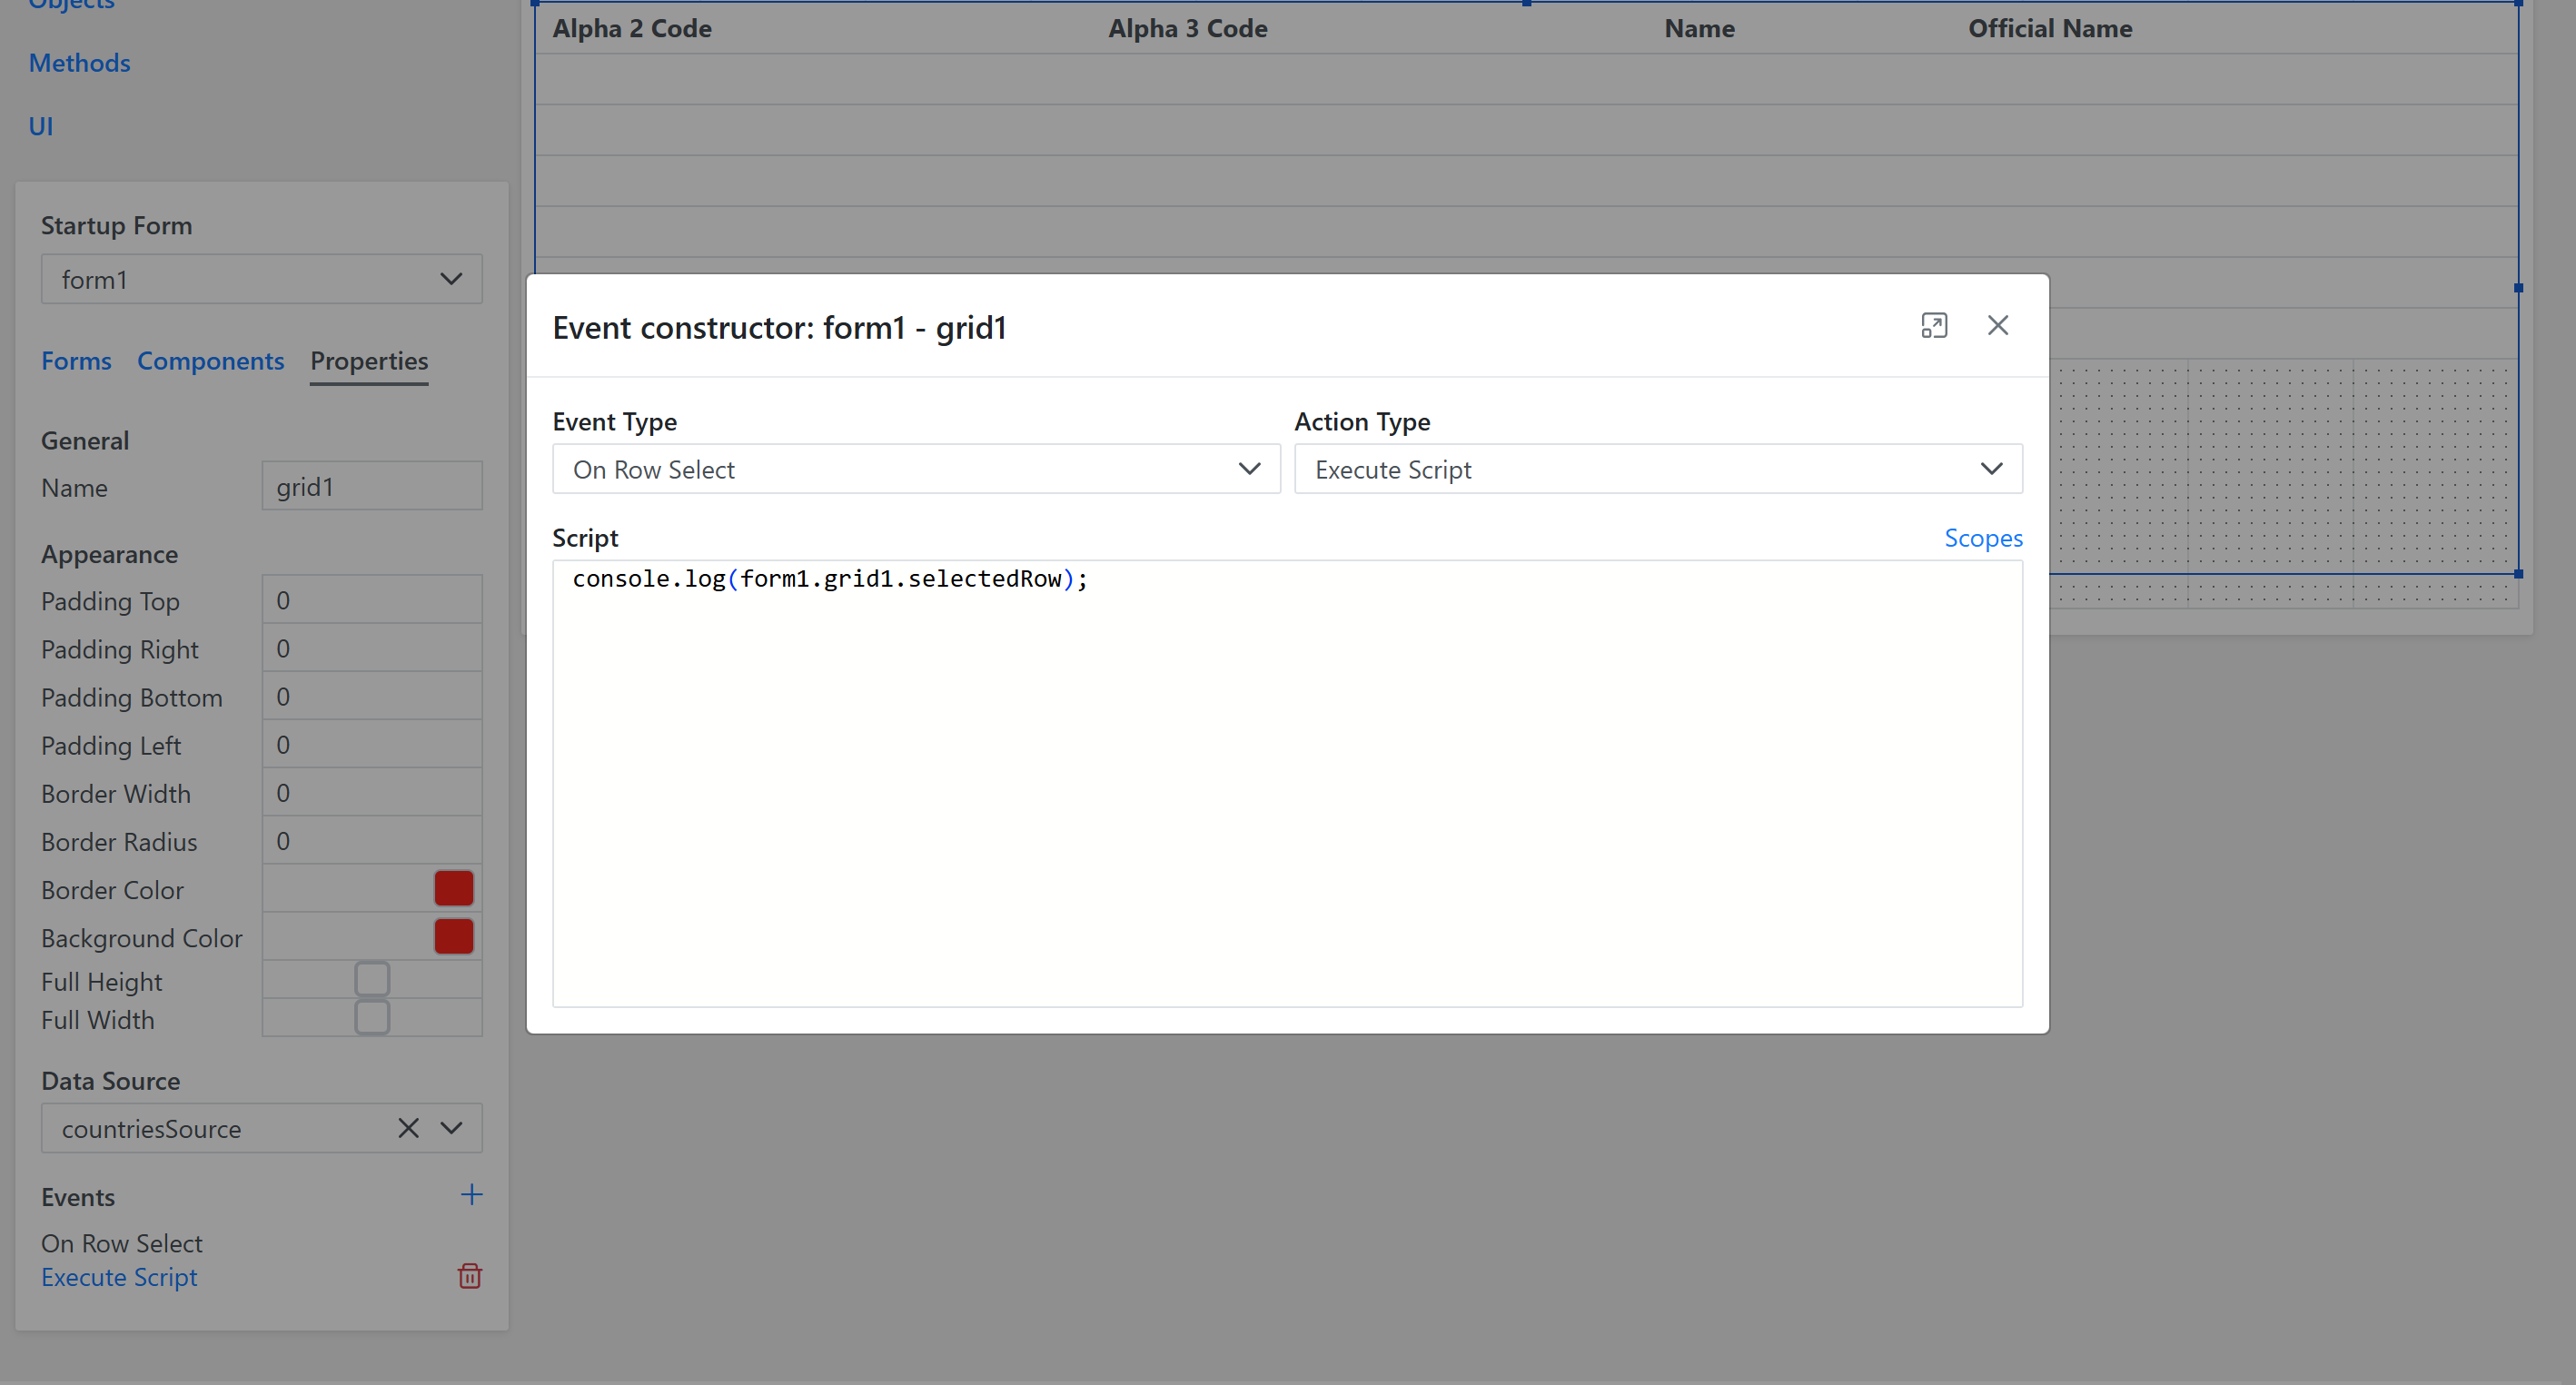
Now, let’s add code that will show selected row in browser console. Select the Grid, go to Properties Tab and click the ’+’ button to add a new Event. Select On Row Select as Event Type, Execute Script in the Action Type dropdown and enter the following code:
console.log(form1.grid1.selectedRow);
Click on Run to see the runtime, click on Button to show the grid data, bring up the browser console and click on any row in the grid:
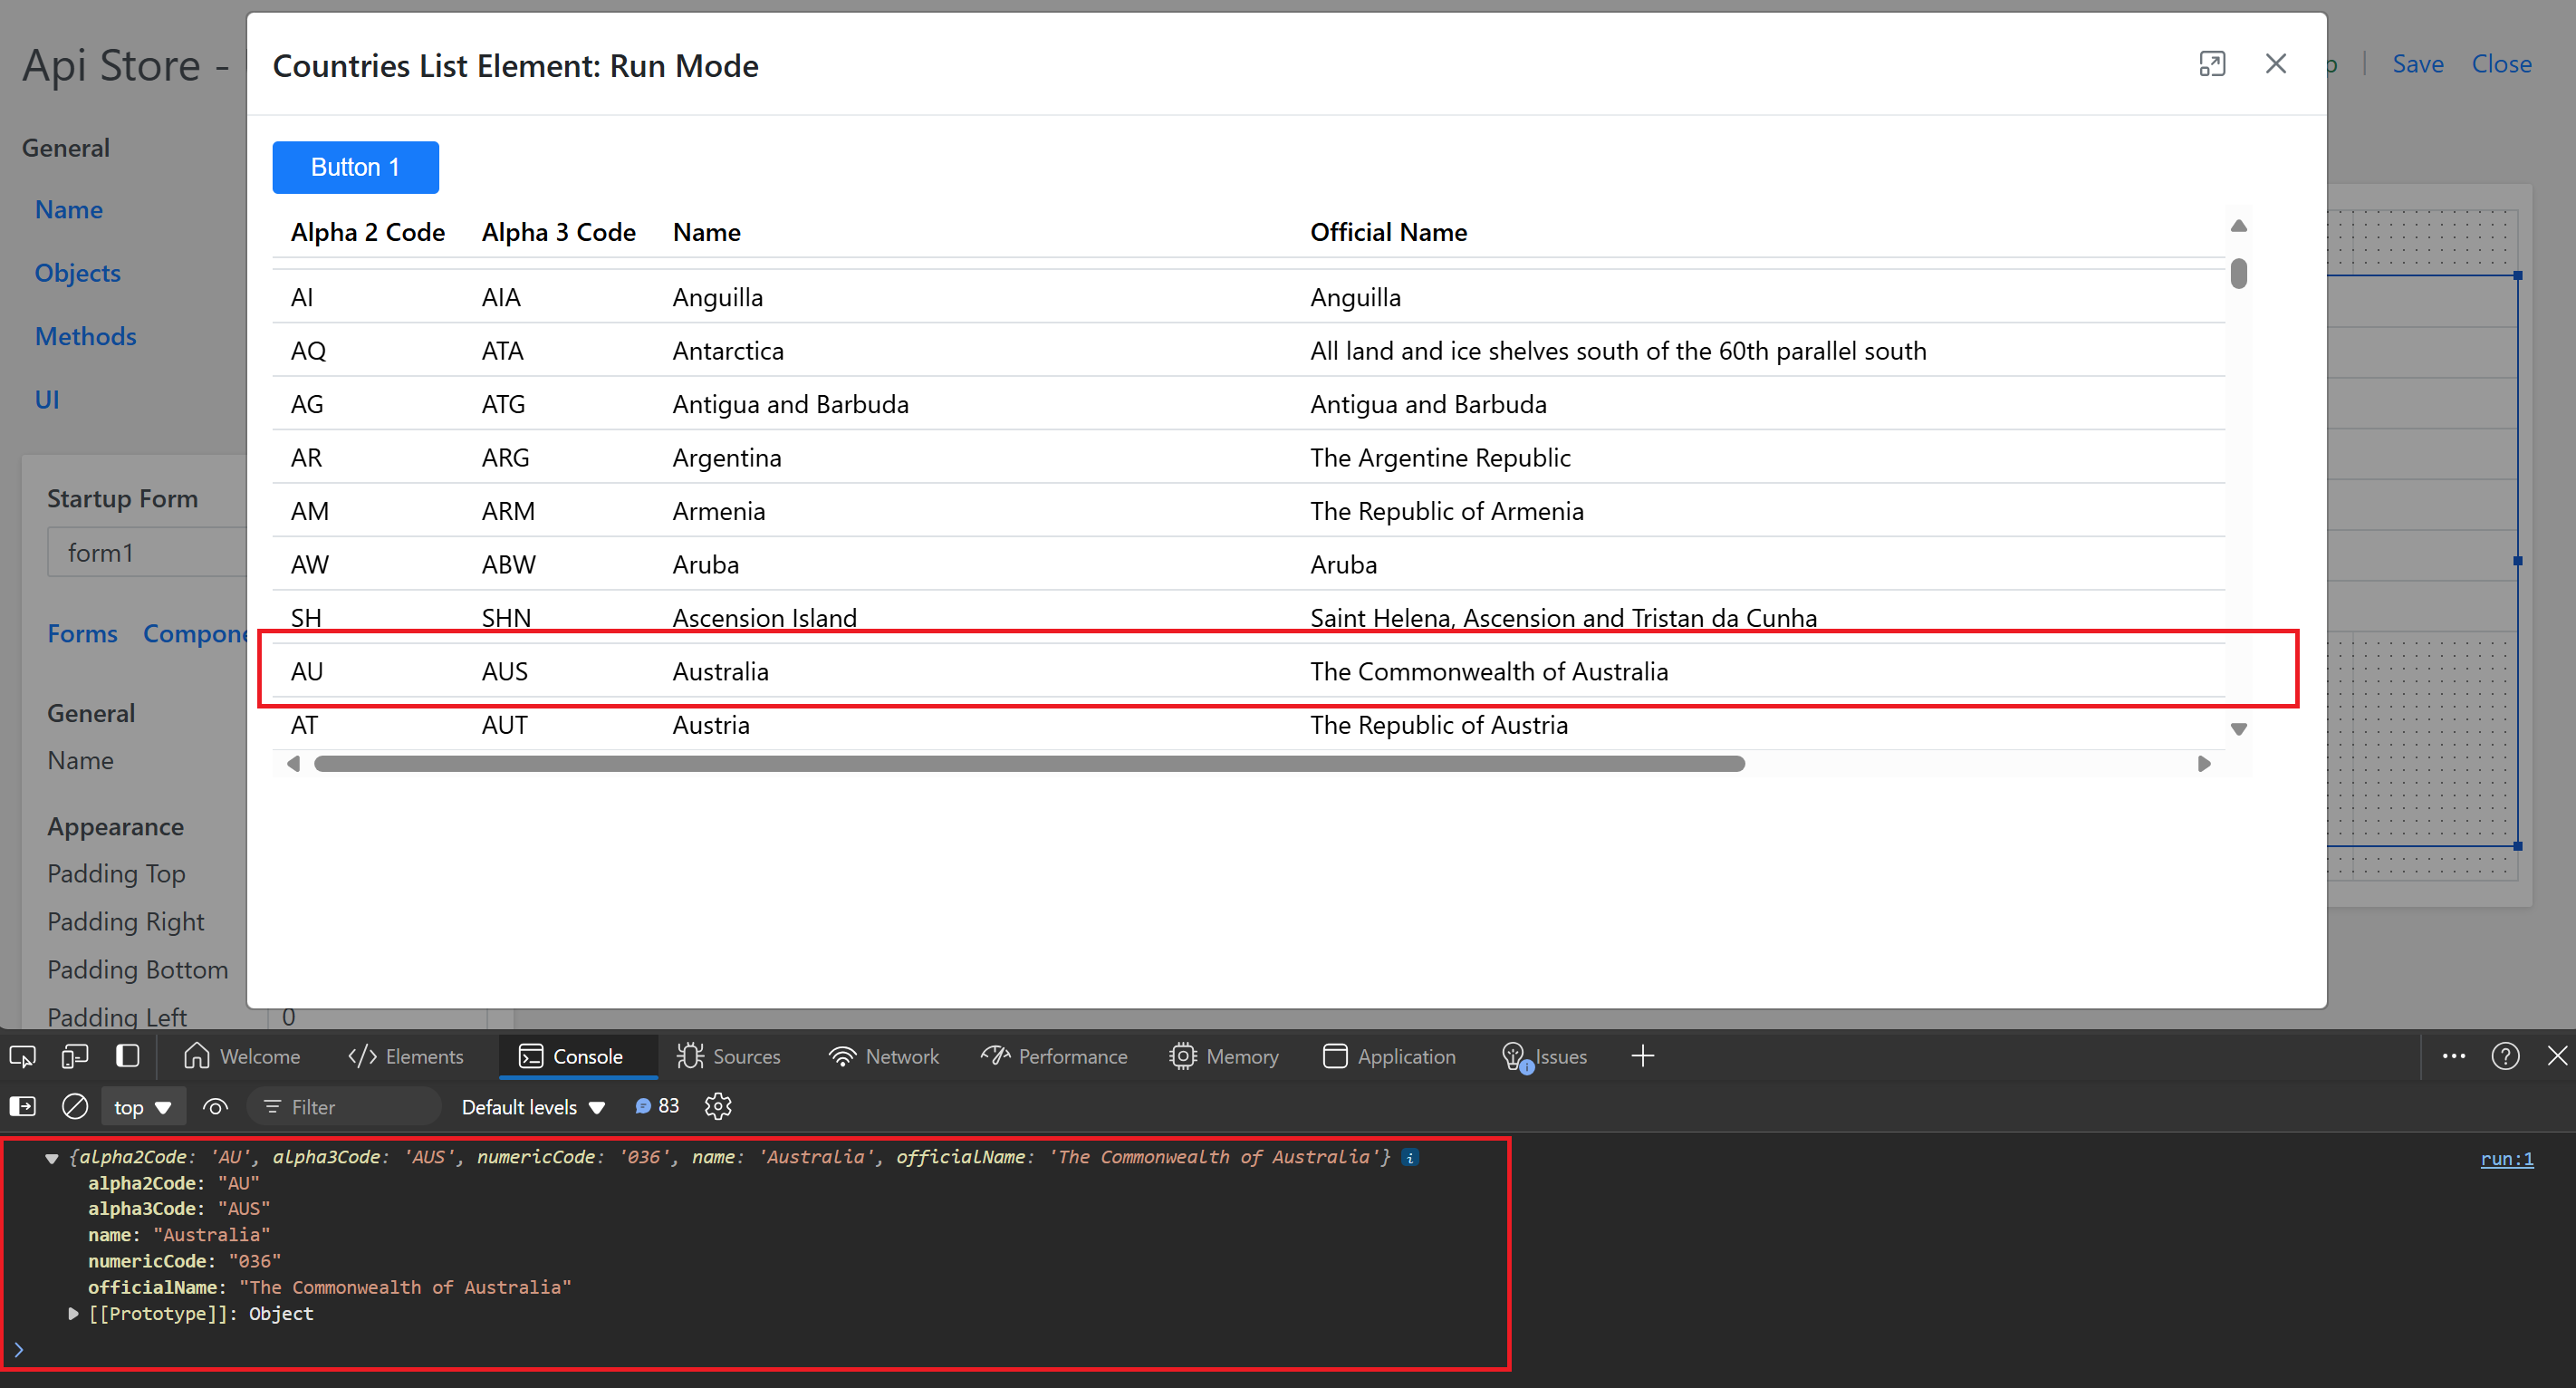
The browser console shows selected grid row.